Why a Compact Solar Kit is a Camping Game-Changer
When power is scarce, a COMPACT SOLAR KIT gives you reliable energy and peace of mind. This guide helps you pick parts, minimize weight, protect gear, enable fast setup, and keep systems ready so adventures and emergencies feel safer today.
What You’ll Need
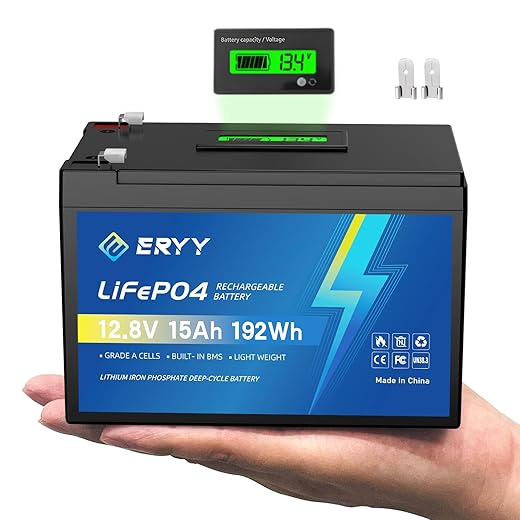
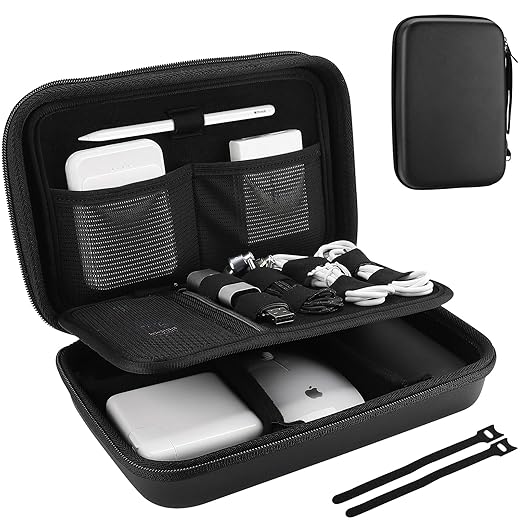
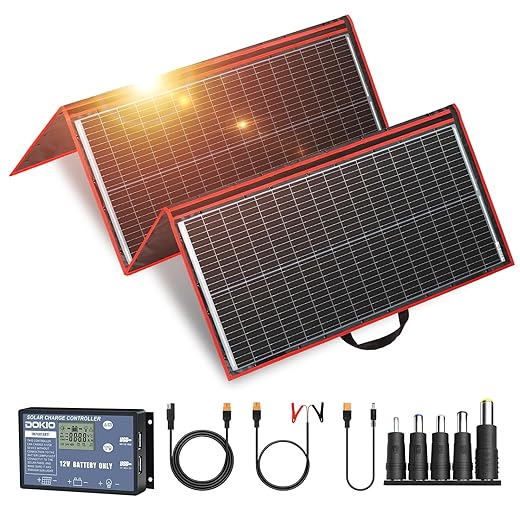
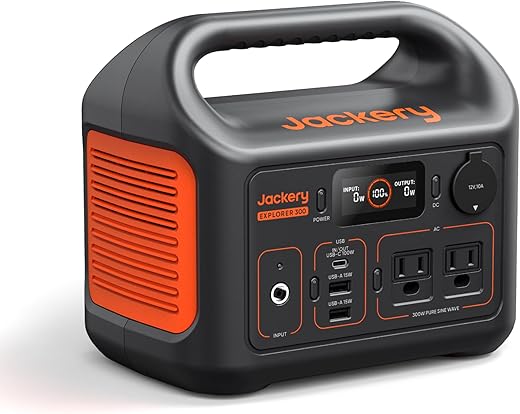
Portable foldable solar panel (10–100W), MPPT or PWM charge controller, 12V/USB battery pack, proper cables/adapters, waterproof case/drybag, small toolkit, duct tape/zip ties, plus basic knowledge of power ratings and safe battery handling.

Step 1: Choose the Right Components
Less can be more — which panel, battery, and controller actually give the biggest real-world payoff?Start by defining what you need to power (phone, lights, fridge, radio). Estimate each device’s daily watt-hours (Wh), add a 20–30% safety margin, and total the Wh needed per day.
Match generation and storage to your load:
Select control and storage hardware:
Check connectors and usability:
Step 2: Plan for Weight, Volume, and Balance
Pack like a minimalist mountaineer — every ounce earns its place. Where should heavy items go?Calculate the total kit weight and compare it to your carry capacity. Weigh each item (battery, panels, controller, cables, pouches), add 10–20% for misc, and decide what fits in a daypack vs car load. For example, a 4 kg battery and 1.5 kg folded panel may be split between two people.
Organize components by size and fragility:
Use modular packing: group related items into labeled pouches (panel accessories, battery accessories, tools). Consider splitting heavy elements between companions, or put the battery in a hip-belt or sling pocket for quick swaps during multi-day trips.
Track volume as well as weight: choose a rigid case for car camping or waterproof drybags for backpacks and wet conditions. Plan the layout before you pack so deployment is fast and balanced.

Step 3: Secure and Protect Each Component
Bubble-wrap helps, but these small tricks stop cracked glass and fried batteries when the trail gets rough.Invest in protective layers: foam inserts for batteries, padded sleeves for charge controllers, and rigid panels inside a hard-shell case or a dense foam–lined soft case.
Use connector caps or heat-shrink over exposed terminals to prevent shorts. Separate batteries from metal tools and loose hardware; tuck tools in a different pouch. Label polarity clearly on every battery and on matching cable ends so hookups stay foolproof.
Place desiccant packets to control moisture and store sensitive electronics in waterproof bags. Store folded panel faces together with a soft cloth between to avoid scratches, and add corner protectors or cardboard wedges to stop chips during transport.
Secure loose cables with Velcro straps or small pouches to avoid tangles and connector damage. Wrap cable coils loosely and tuck them into a labeled zip pouch for rapid deployment.
Test the packed kit by shaking the case and checking for internal movement.
Step 4: Pack for Rapid Deployment and Simple Setup
Can you get power in five minutes? Pack so setup is almost automatic — fewer fiddly steps, fewer mistakes.Prepare a deployment pouch containing the most-used cables, adapters, and a quick-start checklist so you can get panels up in minutes.
Pre-terminate or label cables so you can connect panels to the controller and battery without rummaging—crimped ring terminals or MC4 adapters save time.
Use color-coded or numbered tags to match ports (e.g., red = battery +, blue = controller, yellow = auxiliary).
Fold panels so they can be propped quickly and kept hinge-side accessible for immediate unfolding.
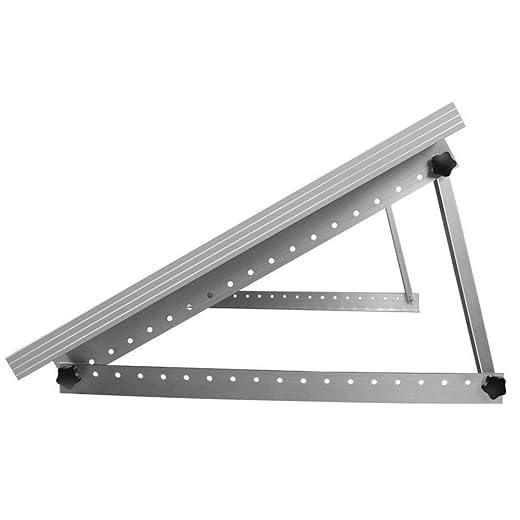
Include a lightweight stand or stakes for rapid angling; pack a fold-flat aluminum kickstand or use two tent stakes and a bungee for a fast improvised support.
Practice one-handed hookups and position the battery at the case edge for easy access while keeping terminals covered.
Include a small multimeter and spare fuses in the quick kit for troubleshooting on the trail.
Pack spare connector caps and a roll of electrical tape for field repairs.
Create a laminated setup diagram and attach it inside the case for cold or wet conditions.
Step 5: Test, Maintain, and Prepare for Edge Cases
A dusty or untested kit is dangerous — simple checks and backups keep your lights on when it matters.Run a full test at home: charge the battery to capacity, then drain predictable loads (phone + 5W light, camera) and note real runtimes. Charge and discharge at least once to verify capacity and to catch heating or voltage drop issues.
Inspect connectors and cables for corrosion or loose crimps. Clean panel surfaces with a soft cloth and mild soap; remove bird droppings and grit that cut output. Check firmware on smart controllers and update if the vendor recommends it.
Establish a seasonal maintenance routine: clean panels monthly in dusty seasons, check battery electrolyte or state-of-charge, and equalize flooded batteries per manufacturer intervals. Replace weak cables or aged fuses before a trip.
Pack a small parts kit:
Keep a printed inventory with serial numbers and purchase dates for each major component to speed warranty claims and replacements.
Ready to Go Solar on the Trail
With the right components, compact packing, protection, and quick-deploy planning, your solar kit will reliably power essentials on trips or during outages. Test it, tweak your setup, then hit the trail—share your results and tips to help others and communities.

23 comments
Pro tip: keep a small roll of gaffer tape in the kit. Emergency fixes, tent anchoring, labeling — it’s the Swiss Army knife of tape. 😉
Wide 2-inch roll for me. Easier to tear and economical. Also works as a quick reflective marker if you put a strip on your pack.
Gaffer tape is an underrated piece of kit — adding to the packing checklist. Do you prefer a certain width or brand?
Good read but felt a little light on real-world numbers. Which panel wattage do you actually recommend for a weekend solo trip?
Also, balance is mentioned a lot, but how do you pack awkward items (like foldable panels) so they don’t shift in a backpack? Any hacks? 🤔
Thanks Marcus — great callout. For weekend solo trips I typically recommend 20–50W panels with a 10,000–20,000 mAh power bank depending on your device needs. For panels in a pack, slide them between pack frames or use a sleeve/flat pocket and add a foam layer to prevent shifting.
I zip-tied a thin piece of foam to one side of my panel and it stops movement. Not pretty but works. 😂
This guide was super helpful — finally a sensible step-by-step for a compact kit.
I especially liked the sections on weight/volume and rapid deployment. Saved me from stuffing my pack with random batteries.
A few notes from my last trip:
– Put the charge controller in a zippered pouch with silica packs to avoid moisture.
– Keep the quick-deploy panel straps separate so you can set it up without digging through everything.
Thanks for writing this!
Great tips, Lena — love the silica pack idea. If you don’t mind, can you share what size pouch you used for the controller? Others might find that detail handy.
I use a small camera accessories pouch (around 6×4 inches). Cheap and fits the controller + a small cable roll. Works like a charm.
Nice — I’ll try the camera pouch. Never thought of that. 😄
A couple of practical things I’ve learned after a few seasons:
– Label your cables with tiny tape flags. You won’t believe how often you grab the wrong cable at night.
– Use velcro straps that match the interior colors of pouches so you can find them fast.
– For emergencies, keep one complete micro-kit (panel + tiny bank + cables) in a separate, easy-to-reach pocket.
Not glamorous, but these saved my bacon multiple times.
Fantastic, Ethan — those are the kind of low-effort changes that have high payoff. Would you be open to a short note from you in the guide to highlight these tips?
Separate micro-kit is gold. Kept mine in a dry bag near the tent entrance — quick grab during a midnight storm.
Adding the separate micro-kit and cable-labeling suggestions to the checklist. Thanks everyone!
Heat-shrink tip is genius. Gonna try that this weekend 🔥
Love the labeled cables trick. I use colored heat-shrink on the ends so they survive wet conditions.
Wanted to add a bit about maintenance from the ‘Test, Maintain, and Prepare for Edge Cases’ section:
– Wipe solar cells gently with a microfiber cloth after dusty days.
– Check connectors for corrosion monthly if you live near the coast.
– Store batteries at around 40–60% charge for long-term storage to preserve lifespan.
I know some of this is basic, but people skip it and then complain about dead gear. 😅
Corrosion check is key. A little dielectric grease on connectors can prevent issues without harming performance.
Agree on the 40–60% charge tip. Learned that the hard way when a battery died after winter storage.
Thanks Danielle — those are solid maintenance items. We’ll expand the long-term storage notes with your suggestions.
Haha, I nearly packed my whole power station last summer (why do I do this to myself?).
This guide helped me slim everything down — now I actually have room for snacks. 😜
Minor gripe: a quick photo of the ‘ideal pack layout’ would be amazing. Visual learners unite!
Agreed on the photo. A top-down photo of the packed kit would clear up a lot of questions for newcomers.
Love the snacks justification — that’s the real test! We’ll consider adding a visual layout in the next update. Thanks for the nudge.