Why a Compact Solar + Battery System Makes Sense
A compact solar plus battery system cuts bills, keeps your lights on during outages, and shrinks your carbon footprint; this guide helps you plan, size, install, and test with confidence.
Compare this with Top 7 Portable Power Picks for Kitchen Gear Today / or 8 Best Foldable Solar Panels: Portable Power for Camping
What You’ll Need

Assess Your Home and Energy Needs
How much power do you actually use? Spoiler: most homes need less than you think—start here.Perform a home energy audit: gather 12 months of utility bills and calculate your average daily kWh.
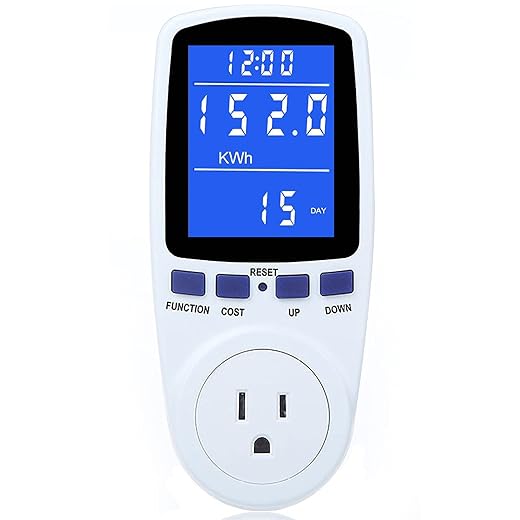
Gather appliance usage data using simple meters (e.g., Kill A Watt) or smart plugs to log watts and run-time; measure motors’ starting currents for fridges, pumps, and HVAC.
Identify essential circuits for backup (fridge, lights, router, medical devices) and estimate their combined running and peak wattage.
Map desired backup duration (e.g., 6–24 hours) to inform battery capacity planning.
Assess available roof or ground space, roof orientation, shading, and structural condition to determine realistic panel area.
Map the backup duration to battery kWh (e.g., 1 kW essential load × 12 hours ≈ 12 kWh plus margin) and estimate panel count from usable roof area.
Choose the Right Solar Panels and Battery
Monocrystalline, polycrystalline, or space blankets? Why the battery choice matters more than the panel brand.Select panels based on efficiency, wattage, and available space — higher-efficiency mono panels (e.g., mono PERC) yield more watts per m²; pick panel wattage to match your available roof area.
Choose battery chemistry by weighing tradeoffs: lithium (long life, lighter, higher upfront cost) versus lead‑acid/AGM (cheaper, heavier, shorter cycle life).
Size battery capacity in kWh to cover your desired backup hours, factoring DoD and usable capacity (example: 1 kW essential load × 12 hours ≈ 12 kWh raw; with 80% DoD buy ~15 kWh nominal).
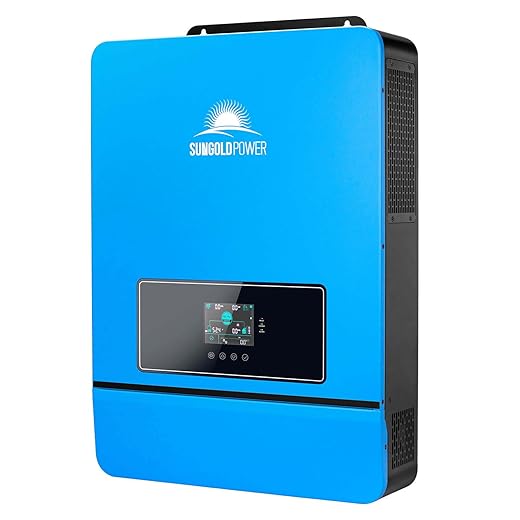
Ensure inverter/charger compatibility (voltage, continuous and surge power, and hybrid/backup modes).
Consider battery cycle life, warranty, BMS features, temperature tolerance, and modular expandability.
Check certifications and manufacturer support.
System Sizing and Design
Don’t guess—design to fit your roof, budget, and outage goals. This is where math pays off.Calculate required PV array size: divide your daily kWh by average sun hours, then adjust for system losses (~15–25%). Example: 30 kWh ÷ 4 sun-hours = 7.5 kW; add 20% losses → ~9 kW array.
Determine inverter ratings: specify continuous and surge watts to cover peak loads and motor starts (e.g., pumps/AC can need 2–4× starting surge).
Size the battery bank: divide desired backup kWh by usable DoD and add a margin for inefficiencies and aging. Example: 12 kWh ÷ 0.8 = 15 kWh nominal.
Decide coupling topology: choose AC-coupled for retrofits or DC-coupled for new builds/greater efficiency with certain batteries.
Plan wiring and layout:
Draw a single-line electrical diagram and prepare a detailed parts list for permits.
Permits, Safety, and Choosing an Installer or DIY Approach
You can DIY—if you love paperwork and wiring. Otherwise, hiring pros avoids costly mistakes.Research local codes, building permits, and utility interconnection requirements early.
Learn rapid shutdown, anti‑islanding, grounding, and labeling rules to avoid inspection rework.
Assess your skills: simple roof‑mounted PV may suit experienced DIYers, but install batteries and grid‑interactive inverters only with a licensed electrician.
Get multiple quotes from certified installers and verify insurance, licenses, and references.
Review warranties and service terms before signing any contract.
Prioritize safety: use fall protection, lockout/tagout, insulated tools, and follow manufacturer procedures.
Plan inspections and coordinate with the utility for final interconnection.
Installation Steps: Mounting, Wiring, and Integrating the Battery
Mount panels first, batteries second—but what if your roof hates drills?Inspect the roof and rafters; confirm structural load and flashing locations.
Install mounts and rails to manufacturer torque; fasten panels with flashing and lag bolts into rafters for a watertight seal (example: use stainless lag bolts into rafter tails).
Route PV DC cables in conduit to combiner and inverter; keep runs short and use PV‑rated wire.
Follow a stepwise install: confirm roof structure and flashing locations, install roof mounts/rails, and secure panels. Route DC cabling to combiner and charge controller/inverter, keeping runs short and using appropriate conduit and PV-rated wire. Mount inverter and battery bank in a ventilated, temperature-stable location near the service panel. Install disconnects, fuses, and breakers per design; ensure correct polarity and torque on terminals. Integrate battery BMS and configure inverter backup/charge settings. Label circuits, install AC transfer switch or critical-load subpanel for seamless backup, and secure all wiring. Maintain tidy cable management and document as-built wiring.
Testing, Commissioning, and Maintenance
Get ready for peace of mind—test now so outages don’t find surprises later.Complete a commissioning checklist: verify wiring and terminal torque, check grounding and bonding, perform insulation resistance tests, and confirm inverter/battery parameters. For example, torque PV/inverter terminals to manufacturer specs (e.g., 6–8 Nm) and use a megohmmeter for insulation checks.
Energize the system in stages: energize inverter controls first, then PV strings, then battery, and finally AC connections. Monitor PV production, battery charging behavior, and test automatic transfer with a simulated outage to confirm seamless backup.
Set up monitoring apps and alerts and record baseline performance (daily kWh, battery SOC profile) for comparison.
Establish regular maintenance:
Keep detailed logs of performance and maintenance, and schedule annual inspections or manufacturer-recommended service.

You’re Ready to Go Solar
Recap: assess needs, choose equipment, design and size system, obtain permits, install safely, and test —start small, scale later, gain resilience and savings; try it, share results, take action today.


42 comments
Minor nitpick: the guide’s language on net metering is U.S.-centric. Maybe add a short section for other common billing schemes (feed-in tariffs, time-of-use credits, export limits) so international readers don’t get confused.
Otherwise, excellent flow and the commissioning checklist saved me from a bunch of rookie mistakes.
Agreed. Even within the US different utilities treat exports differently — it’s worth checking before you decide to oversize panels.
Yes please. In my country we have very limited export, so battery-first makes more sense. Context like that will help readers choose correctly.
Thanks Nora — you’re right. We’ll expand the billing/net metering section with brief explanations of common international schemes and how they affect system sizing and battery strategy.
We’ll include a callout for readers to check their utility policy and link to sample utility webpages for reference.
I appreciate the ‘Why it makes sense’ intro — it helped convince my partner that batteries aren’t just a fad.
One constructive critique: the cost breakdown felt a little high-level. Maybe add a short sample budget with typical cost ranges for components vs labor in different regions? Even ranges (low/mid/high) would be helpful.
Good point, Priya. We’ll add a sample budget with low/mid/high ranges and separate component vs labor costs, plus notes about regional variance.
Yes please — when I priced mine out last year I saw a 30-40% regional swing. That would’ve saved me time doing quotes.
Even ballpark numbers help. I used a calculator online and it was all over the place — a realistic range from the guide would be handy.
We’ll aim to include a US and EU sample table and call out that permits/inspection fees can be a hidden cost.
Great guide! Quick q: for a compact system on a townhouse roof (limited space, partial shade midday), would you prioritize higher-efficiency panels or add more panels with microinverters? Iʼm leaning toward microinverters because of the shading but not sure about cost vs benefit.
Also note: microinverters add per-panel points of failure, but many come with long warranties (20-25 years). Consider warranty length and monitoring features too.
Microinverters for the win. I had a similar setup and the drop-off during cloudy/partial shade was way lower than my buddy’s string inverter system.
Costwise, microinverters used to be way pricier but prices have come down. Ask for a performance model comparing output under typical local shade conditions.
Good question, Jason. For partial shading, microinverters or DC optimizers generally outperform a string inverter because they isolate panel performance. If roof area is limited and you need max watts per sq ft, high-efficiency panels help too. If budget allows, combine high-efficiency panels with microinverters — best of both worlds.
If you want cheaper, use a string inverter and avoid putting shaded panels in the same string. But that’s fiddly; microinverters are simpler long-term.
Loved the practical photos in the installation section. One question: do you recommend a metal flashing detail for roof penetrations if running conduit through the roof? I didn’t see a specific flashing type called out.
Great observation, Diego. We recommend stainless steel or aluminum flashing with a rubber boot for conduit penetrations and will add a short how-to plus photo showing best practice.
Practical tip: take photos of your attic/array layout before you start cutting holes. When you do the wiring and battery placement you’ll thank yourself later.
Also, the troubleshooting checklist in section 6 was gold — wish other guides were that pragmatic.
Great tip, Tom. We’ll add a reminder to photograph critical stages (roof layout, attic routing, panel orientation) to the installation steps.
Seconding the photos. When I sold my house, the buyer asked for pics of the install — saved a lot of back-and-forth with the inspector.
Really loved the step-by-step layout — super approachable for a first-timer.
A couple of thoughts:
1) When you talk about sizing the battery, maybe include a simple table or quick example for a 2-bedroom vs 4-bedroom home.
2) Permits section was helpful but zoning rules in my city are weird — a checklist of typical municipal requirements would be clutch.
Thanks for making a guide that doesn’t assume I’m an electrician 😂
Totally agree about the examples. I used a similar guide last year and the example for my 3BR saved me from getting the wrong size battery.
If you want, I can share the permit checklist my town uses — it was surprisingly standard across several nearby towns.
Thanks Maya — great suggestions. We’ll add a couple of example sizing scenarios (2BR vs 4BR) and a short checklist of common permit requirements for different jurisdictions.
Short and sweet: the maintenance checklist in section 6 is underrated. I set a yearly reminder to check panel cleanliness and battery health. Saved me from an inverter failure last winter.
Nice to hear that you found it useful, Ethan. If you have a maintenance workflow you’d like to share, we’d love to include a user-submitted checklist.
I did a system sizing with the method in section 3 and it was surprisingly accurate. Couple things I changed:
– I increased the estimated evening consumption by ~10% to be safe
– Chose a slightly larger inverter because I run a window AC sometimes
If anyone wants a copy of my simple spreadsheet, happy to share!
I’d love that spreadsheet! I’m a weekend DIYer and a template would make sizing less scary.
Sent a DM to the admin with the sheet — feel free to post it if it’s useful to others!
That’s awesome, Rachel — if you share the spreadsheet we’ll link it as a downloadable example in the guide (with your permission).
A few things I laughed and cried over while reading this:
– Laughed: the ‘You’re Ready to Go Solar’ pep talk — so motivational 😆
– Cried: realizing my attic is a tangle of cables and I’m the one who has to route battery cables there 🙈
Also: anyone else nervous about storing a 48V battery in a small utility closet? The safety section touched on ventilation but I’d like more specifics (clearances, fireproofing ideas).
We hear you, Sofia. We’ll expand the safety section to include recommended clearances, ventilation guidelines, and fire-resistance measures for indoor battery installations. Also include examples for common battery chemistries (Li-ion vs AGM).
If it’s a Li-ion pack, keep it in a cool, ventilated area and consider a smoke/thermal alarm nearby. I also sealed the floor with a non-combustible mat as extra caution.
I installed a battery in my garage behind a fire-rated cabinet and added a small vent near the ceiling. Check local code — some places require dedicated rooms for larger batteries.
One more tip: some manufacturers require batteries be installed in areas protected by specific detectors — we’ll add that note to the safety checklist.
If this helps: I put a small fire suppression canister nearby (the type used for server racks). Not a replacement for code compliance but added peace of mind.
I tried the DIY route for mounting and wished I’d paid more attention to the conduit and wire sizing bit in section 5. My first electrician visit fixed it in 20 minutes but charged me a lot. If you’re not 100% confident, save yourself the headache and hire a pro.
Good read. I’m still stuck on inverter selection though — hybrid vs backup-only vs whole-home inverters. Guide touched on it but I’d love a clear flowchart: “If you want X, pick Y.”
Heads up for folks in colder climates: battery performance dips with temps. The guide mentions temp derating but doesn’t give a rule of thumb — eg. how much capacity loss at 0°C vs 20°C? That would’ve helped me pick a slightly larger bank.
Good point. We’ll add a small table showing typical derating for common battery chemistries across temperature ranges and recommended oversizing percentages for cold climates.
In my experience, plan for ~10-20% derating in very cold climates, depending on chemistry. Also, keep batteries in a conditioned space if possible.