Why a Fridge Backup Plan Matters
A single power outage can ruin days of groceries and interrupt essential medications—we’ve seen families lose hundreds of dollars of food in a single night. Protecting the fridge is one of the highest-impact steps we can take to save money and reduce stress when the lights go out.
Compare this with Honda EU2200i guide / or Honda EU2200i comparison
This guide explains why a simple backup plan works and how we make choices that fit our risk tolerance and budget. We’ll cover what to protect (food, medicine, vital items), backup power options with pros and cons, how to size a system for runtime and battery capacity, safe setup and practical tips, and testing and recovery steps for reliable operation.
Our goal is practical: straightforward calculations, clear safety rules, and a quick-start plan we can use the first time power fails. We keep explanations short, with checklists and numbers we can actually use every day now.


What to Protect: Prioritizing Food, Medicine and Vital Items
Quick triage: what to move, eat, or toss
When the power goes out we start with a quick, calm sweep: open fridge doors as little as possible, check temperatures, and separate truly critical items. Use this simple 4-step triage we can do in under five minutes:
Special categories: medicine, baby formula, and high-value items
Some things aren’t just about taste or money—they’re about health and safety. We treat them differently:
Decision matrix: quick “keep, eat, move, toss” rules
Use this as our in-the-moment checklist:
Practical tips we can use right now
Next, we’ll look at backup power options so we can keep these priority items cold for hours or days, and choose the right solution for our household.
Backup Power Options: Pros, Cons, and When to Choose Each
We break down the main choices so we can match technology to our needs and lifestyle. Below we explain how each option works, real-world pros and cons (noise, emissions, cost, complexity, portability), and typical situations where it shines.
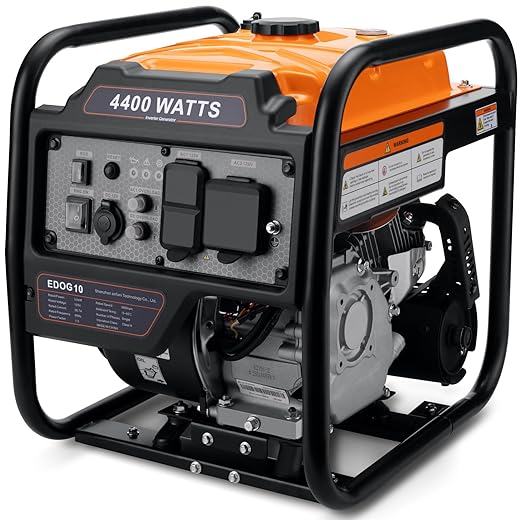
Portable gas generators — conventional and inverter
Conventional open-frame generators (e.g., larger Westinghouse or Champion units) are workhorses for long runtimes and heavy loads; inverter generators (Honda EU2200i, Yamaha EF2000iS) give cleaner power for sensitive electronics and run quieter.
Pros:
Cons:
Camping or long outages where we need to run the fridge plus HVAC or well pump? A reliable generator is our go-to. For smaller households wanting quieter operation, an inverter model fits best.
Battery-based power stations and UPS
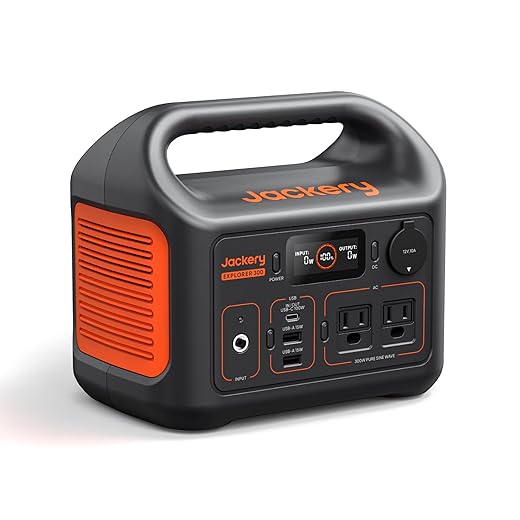
Portable power stations (Jackery Explorer, EcoFlow Delta, Bluetti) and home UPS units provide silent, zero-emission power. UPS (APC BR1500) can bridge short outages, while larger stations run a fridge for several hours.
Pros:
Cons:
Best for shorter outages, urban settings with noise restrictions, or when we want quick, maintenance-light operation. A UPS plus a mid-size power station is great for overnight outages.
Solar-plus-battery combos
A solar array charging a battery bank gives long-term resilience and lower running cost. Systems range from portable panel + power station kits to whole-home setups (Goal Zero Yeti with panels, rooftop + batteries).
Pros:
Cons:
Ideal for sunny regions and for households that want ongoing power independence rather than temporary fixes.
Hybrid and temporary measures
Hybrid: combine a generator with a battery inverter (generator for charging, battery for quiet nighttime operation). This balances runtime, noise, and fuel use.
Temporary measures and community options:
Safety tip: never backfeed the grid; use proper transfer equipment and follow local codes.
Next, we’ll calculate what our fridge actually needs — watts, runtime, and battery capacity — so we can pick and size the option that fits our budget and habits.
Sizing Our Backup: Calculating Fridge Power Needs, Runtime, and Battery Capacity
We’ll walk through simple steps so we can pick a generator, inverter, or battery bank that’s big enough — but not oversized.
Find or estimate starting (surge) and running watts
Look for the fridge nameplate (back or inside) or the manual. Useful clues:
Convert watts to battery amp-hours (Ah)
For AC fridge via inverter, conservative formula:Ah = (Watts × hours) / (Battery voltage × inverter efficiency)
Example: a 200 W fridge for 8 hours on a 12 V battery with 85% inverter efficiency:Ah = (200 × 8) / (12 × 0.85) ≈ 157 Ah
Remember inverter must handle the starting surge; choose an inverter with higher surge rating (e.g., a 2000 W inverter for a 1200 W surge).
Account for duty cycle, ambient temp, and safety margins
Fridges cycle on/off — use a duty cycle to estimate average load:
Add safety margins:
Quick sample comparisons
Questions to ask about our model
Next, we’ll use these sized numbers to set up a safe, practical system — wiring, inverters, transfer methods, and placement — so our backup actually runs when we need it.
Safe Setup and Practical Tips for Reliable Operation
We move from sizing to the hands-on steps that keep our backup safe, simple, and trustworthy. Below are practical do’s and don’ts we can use the next time the power drops.
Generator placement, ventilation, and safety
We always put a portable generator outdoors, on a flat, non-combustible surface, at least 10 feet from doors and windows, and with the exhaust pointing away from the house. Carbon monoxide kills silently—always run CO detectors inside and never run a generator in a garage, even with the door open. In my neighborhood we place generators on a concrete paver and use a small windbreak to reduce spray in rain.
Avoid backfeed: transfer switches and interlocks
We should never plug a generator into a wall outlet. To prevent dangerous backfeed:
Wiring, cords, and grounding basics
Use heavy-duty, outdoor-rated cords sized for the generator’s amperage (10/3 for 30A, 6/3 or 4/3 for higher loads). Keep connections dry and protected. Follow the generator manual on neutral-to-ground bonding—don’t modify bonding arrangements without consulting an electrician. When in doubt, hire a pro to wire a transfer switch and ground rods.
Fuel handling and storage
Store gasoline in approved jerry cans, in a cool ventilated place, and rotate every 3–6 months. Diesel stores longer; propane is best for long-term storage. Never store fuel indoors near living spaces. Keep a small spill kit and a fire extinguisher nearby.
Battery system installation and routine care
For batteries, we prefer LiFePO4 for space and cycle life; if using lead-acid, install in a ventilated area (hydrogen off-gassing risk), on a non-conductive tray, and shield terminals. Use a proper battery monitor (Victron BMV-712 or similar) to track state of charge. Maintenance for flooded lead-acid includes terminal cleaning and topping with distilled water; LiFePO4 needs only periodic voltage checks.
Keeping the cold chain intact
When power is limited, our best tools are planning and minimizing door openings:
These setup practices make our backup reliable and safe. Next, we’ll practice and maintain the system — testing, simple monthly checks, and a short quick-start checklist so we can get refrigeration running fast when an outage hits.
Preparedness and Recovery: Testing, Maintenance, and Our Quick-Start Plan
We translate planning into small, repeatable habits so our backup works when we need it. Below are the routines and checklists we use to stay ready without letting it become a chore.
Regular testing schedule
Pre-outage quick checklist
Seasonal maintenance reminders
Budgeting and replacements
Quick-start cheat sheet (generators)
- Move generator outdoors, clear exhaust, check oil/fuel.
- Turn on CO monitors inside.
- Open fuel valve, choke as manual directs, start and warm 2–5 minutes.
- Connect via transfer switch or heavy-duty cord to dedicated outlet.
- Turn on essential circuits one at a time; monitor load and temps.
- Refuel only after shutdown and cooling.
Quick-start for power stations (e.g., EcoFlow Delta Pro, Jackery Explorer 2000): ensure 100% charge, plug fridge into dedicated AC output, monitor wattage and BMS app.
After the outage: recovery steps
With these simple routines and a one-page cheat sheet, we keep readiness light and reliable — next, we’ll put the whole plan into practice.
Putting the Plan into Practice
We now have a compact, realistic approach: decide what matters, pick a backup that fits, size it to our fridge, set it up safely, and keep a short checklist for outages. Test the system, maintain batteries, and rehearse the quick-start steps so activation is calm and fast. Start small if needed and improve over time—preparedness grows with simple, regular habits rather than big, sudden projects. Let’s choose the option that works for our household, run a live test this month, and keep protecting food, medicine, and peace of mind. We can do this together confidently.


30 comments
This article came at the perfect time — we just moved into an older neighborhood with flaky power. A few notes from my side:
– Loved the step-by-step on sizing the battery; I measured our fridge and the Jackery Explorer 300 looks like a good emergency option for short outages.
– The thermometer tip is gold. Placing 2-pack indicators in the fridge and freezer saved us from guessing temps last time.
– I also appreciate the quick-start checklist for when the power goes out — less panic that way.
Thanks for making this practical and not too scary 👍
Thanks Lena — glad it was helpful! If you’d like, share your fridge’s wattage and runtime goals and we can help run the numbers for the Jackery vs a generator option.
Agree about the thermometers — saved my leftover lasagna last year. One extra tip: put the dial in the middle shelf, not the door, for a truer reading.
Question: did you end up pairing the Jackery with any extra batteries or solar? I’m considering it but worried 292Wh won’t last long for a mini-fridge.
Love the emphasis on testing and maintenance. A couple of practical things I do:
– Run my Jackery and fridge once every 2 months to make sure the inverter holds up.
– Keep a 2-pack of spare dial thermometers in the pantry.
– Label my generator fuel can and rotate every 6 months.
Small habits like these keep emergency plans actually useful instead of just ‘theory’.
Agree about testing. I did a full dry run last winter and discovered a bad extension cord. Fixed it before an actual outage.
Great habits, Sophie. Rotating fuel is huge — stale fuel causes more problems than most expect.
Solid plan overall. A few constructive notes from an electrician’s POV:
1) The 50A 10-circuit generator transfer switch kit is only as good as the installation — improperly paired neutrals or loose connections can be dangerous.
2) Don’t DIY the transfer switch unless you absolutely know what you’re doing. It’s not worth risking backfeed to the grid.
3) Test the generator and transfer switch monthly like the article recommends.
Also, for anyone worried about generator sizing: list every heavy appliance you might run, add starting watts, and size up by 20% to be safe.
Exactly. And take photos of breaker labels before you start so everyone knows what’s what.
As an amateur, I hired an electrician and it took 2 hours. Worth every penny — no weird trips or breaker issues afterward.
Thanks for the reminder, Carlos. I’ll call a pro for the install — not worth risking it.
One more safety note: always shut off the main breaker before connecting generator power to the transfer switch, per the kit’s instructions.
Great practical tips, Carlos — appreciate the pro perspective. We added a callout about hiring licensed electricians for transfer switch installs.
Nice article! Quick Q: those big dial thermometers — are they accurate? I accidentally put one in the door last time and it lied to me lol 😅
They’re good for a general idea but not lab-precision. If you want more exact, get a digital probe. But for emergency use the dial ones are cheap and do the job.
They are pretty reliable when placed correctly. As Tom mentioned earlier, keep them in the middle shelf for accuracy — doors fluctuate a lot.
This article is thorough and practical. I ran a quick back-of-envelope for my 18 cu ft fridge:
– Running watts: ~150W
– Start-up surge: ~900W for <1s
- Desired runtime: 12 hours overnight
Using the Jackery Explorer 300 (292Wh) alone: 292Wh / 150W ≈ 1.9 hours — not enough. Even with clever cycling, you won't get 12 hours.
So options:
1) Use the Jackery for short outages and essential meds/food only.
2) Use an inverter generator (Oxseryn) with the transfer switch for extended outages.
3) Or get a much larger battery bank (parallel setups) and a proper inverter.
Also, remember to account for inverter efficiency (~85-90%) and fridge cycling when you do the math. Good article for people starting the planning process.
Thanks — happy to help. If anyone wants I can run numbers for their specific fridge model.
We didn’t list specific brands for switches beyond the kit, but most big-name kits are fine if UL-listed. Ask your electrician for a recommendation based on your panel.
This is the kind of post I needed. Could anyone recommend a specific electrician-friendly transfer switch model? The article mentions the 50A kit but not brands.
Thanks Hannah — that’s a great worked example and exactly the kind of calculation we wanted readers to attempt. Your numbers (and note about inverter efficiency) are right on.
For most households, a hybrid approach (Jackery for short outages/critical items + generator/transfer switch for longer outages) is the most practical.
Good roundup, but I’m skeptical about recommending the Jackery Explorer 300 as a primary for anything bigger than a mini-fridge. The math in ‘Sizing Our Backup’ is correct — you need to consider start-up surge — and many fridges spike way above the Jackery’s continuous output.
Also, the Oxseryn 4400W generator sounds great on paper, but noise and fumes are real issues in a suburban setting. The 50A transfer switch kit is a solid safety move if you plan to go that route though.
I switched to a small propane generator for longer outages and keep the Jackery for charging phones and quick tasks. Noise was an issue at first, but a muffler and positioning helped.
Thanks — I might do that. Also, do others feel the transfer switch kit is worth the electrician install cost? Seems pricey but probably worth it.
The transfer switch adds cost but avoids unsafe parallel cord setups. Electrician install is recommended — safer and often faster to get it right.
You’re right to flag start-up surge — we stress that in the article. For many full-size fridges, the Jackery is best as a short-term or supplemental solution. For longer outages, the inverter generator + transfer switch is the safer bet.
If you want, post your fridge model and we’ll estimate starting watts vs runtime.
Haha, I was planning to just fill the bathtub with ice and call it a day, but this article gave me a proper plan. Still, if the power goes out for like 2 days I’m absolutely raiding the neighbor’s grill 😂
Serious note: Any tips for reducing fridge cycles to extend runtime on a Jackery?
Lower fridge temp a notch before outage (don’t go unsafe), keep the door shut as much as possible, and move frequently used items to a secondary cooler so you open the fridge less.
Also, fill half-empty fridges with jugs of water to increase thermal mass. Works like magic.
Good call on the water jugs. And maybe I’ll use the neighbor’s grill but offer burgers in return 😉