
Why a Hurricane Power Playbook Matters to Us
Power outages during hurricanes last an average of days — but they don’t have to leave us powerless. We know the stress of sudden darkness, spoiling food, and interrupted medical equipment. With a clear, actionable power plan we can stay safe, comfortable, and in control.
Compare this with Honda EU2200i comparison / or Honda EU2200i guide
This guide helps us understand where and why we lose power, assess how much backup we need, choose the right technologies, secure fuel and supplies, and operate systems safely before, during, and after a storm. Calm, practical steps and checklists will make keeping critical systems running achievable for our households and neighborhoods.
Together, we will build a plan that protects people, pets, and priceless memories and property too.


Understanding Vulnerabilities: Where We Lose Power and Why
How hurricanes physically take power down
Wind rips down limbs and lines, storm surge floods substations, and salt-laden spray corrodes connectors until they fail. A falling tree can sever a single service drop or shear a primary feeder — the difference between a neighborly flicker and a whole-street blackout. We’ve seen gusts topple utility poles and send transformers smoking; waterlogged vaults short out circuits for blocks.
Cascading failures: small damage, big blackout
The grid is a network. When one feeder or transformer goes, utilities reroute power; if backups are overloaded or damaged, outages cascade. That’s why a broken pole near an artery can plunge entire neighborhoods. The practical takeaway: failures compound. Redundancy at the household level (separate backup for critical loads) matters because the grid’s redundancy can fail too.
What we must keep powered first
Not all loads are equal. Prioritize:
A UPS like the APC BE600M1 can bridge short outages and protect routers and medical gear while a generator spins up.
Typical outage timelines and scenarios
Localized pole or transformer damage: hours to a few days. Major hurricane impacting transmission/substation or causing flood damage: several days to weeks. Wide-area grid collapse is rarer but possible after cascading failures or prolonged flooding — plan for multiple days. The timeline determines whether we need short-run UPS, portable generators for days, or larger fuel/battery reserves.
Practical, immediate checks
Knowing what’s most at risk lets us match solutions to reality — next we’ll quantify how much backup power those prioritized loads actually require.
Assessing Our Needs: How Much Backup Power Do We Actually Require?
Inventory the essentials, then quantify
We start by listing what must stay on and for how long: medical devices, refrigeration, communications, sump pumps, lights. For each item note nameplate watts and expected hours of use. Common reference points:
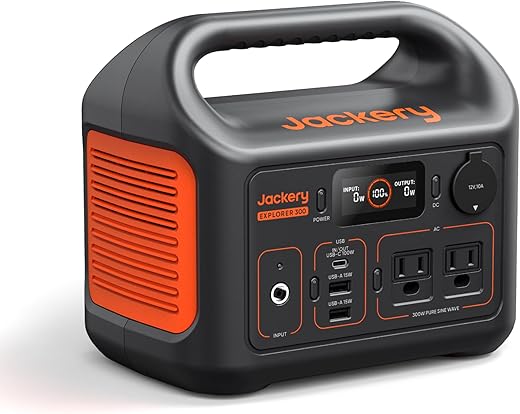
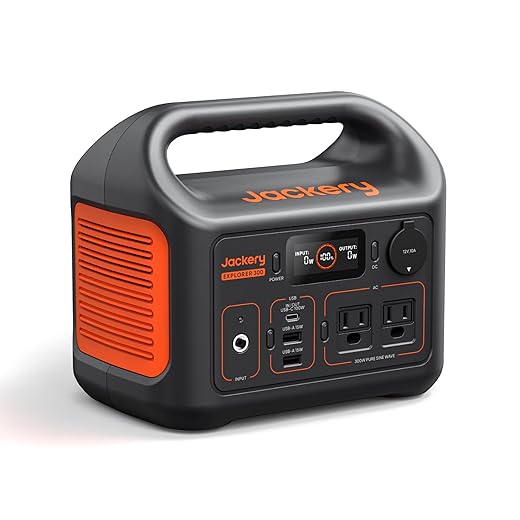
A small unit like the Jackery is great for phones, routers, CPAP backup for a night, or to bridge while a generator starts.
Calculate watt-hours and starting surges
Use simple math: Watt-hours = watts × hours. Add a 10–20% inverter/efficiency buffer. For motors, size for starting surge — assume 2–3× running watts if nameplate startup isn’t listed. Example: a 150 W average fridge over 24 hours ≈ 3,600 Wh (plan battery capacity accordingly or run it cyclically).
Prioritize and choose a tier
We recommend a tiered approach:
For batteries: plan 1–3 kWh per person per day for basics; 10–20 kWh to cover a typical whole‑house day. For generators: add running watts and ensure peak capacity for motor starts — portable inverter generators (e.g., Honda EU2200i) are fine for tiers 1–2; 7–22 kW standby units serve whole‑house needs.
Scale by household type and special needs
Single household vs. multi‑unit vs. community changes everything: multi‑unit needs centralized gensets and load management; communities require shared fuel/storage and distribution plans. Don’t forget pets, refrigerated meds, and chronic medical equipment — these shift sizing immediately.
Next, we’ll translate these targets into technology choices: generator sizing, battery kWh, and hybrid strategies that match our risk tolerance and budget.
Choosing the Right Technologies: Generators, Batteries, and Hybrid Systems
Portable vs. Standby Generators
Portable generators burn gasoline, diesel, or propane to produce AC power. They’re simple to buy and deploy — great for short-term, high-startup loads (sump pumps, window AC). Installation complexity: low for temporary use, but safe operation needs a transfer switch or generator interlock and careful fueling. Runtime depends on tank size and load (4–12 hours typical). Noise and emissions are high compared with batteries. Costs range from roughly $500 for small units to $3,000 for larger inverter portables; whole‑house standby units (Generac, Kohler) cost $5k–$15k+ installed and require professional hookup and an automatic transfer switch (ATS).
Inverter-based Battery Systems
Inverter-based systems store DC energy in lithium or lead-acid batteries and convert it to clean AC via an inverter. They’re quiet, emit no onsite pollution, and are excellent for sensitive electronics and fast seamless transitions (seconds or sub-second with good inverters). Installation: wall-/floor-mounted with electrician tie-in to a critical‑loads subpanel or whole‑house system. Runtime = battery kWh ÷ load (e.g., 5 kWh battery at 500 W load ≈ 10 hours). Costs vary widely — roughly $400–$1,000+ per kWh installed today. Batteries remove fuel logistics but need temperature control and occasional state-of-health checks.
Solar-plus-storage and Hybrid Systems
Solar panels charge batteries during the day, extending runtime and reducing generator fuel use. Hybrid systems combine solar, batteries, and a generator with a hybrid inverter/load manager. Installation is complex (roof work, permits, multi‑component wiring) but gives long-duration resilience and lower operating cost. Typical costs: $10k–$40k for meaningful solar + storage setups depending on scale.
Integration Options & Practical Tips
Next, we’ll walk through installation, safety protocols, and maintenance routines so our chosen technology stays reliable when the storm hits.
Fuel and Supply Chains: Keeping Power Available When Infrastructure Fails
We tackle the logistical realities of keeping backup systems fed when roads are blocked, pumps are down, and suppliers are overloaded. Below we walk through fuel choices, safe storage, sourcing options, and practical contingency steps we can act on today.
Fuel types — quick pros & cons
Gasoline: readily available, high energy density, but goes stale in weeks and is dangerous to store in quantity (use approved containers).
Diesel: longer shelf life with stabilizers, better for heavy loads and standby gensets; thicker fuel can gel in cold and needs filtration.
Propane: stable, very long shelf life, good for standby generators (less maintenance), but requires tanks and fittings.
Natural gas: continuous via utility lines when available — excellent when it stays on, but vulnerable to pipeline/service disruption.
Safe storage and legal/regulatory notes
Store only allowed volumes in approved containers; check local ordinances and fire codes for limits. Rotate fuel (first in, first out), use stabilizers for gasoline (e.g., PRI-G or Sta‑Bil) and label dates. Keep spill kits and grounding/bonding equipment for transfers.
Sourcing strategies
Alternative fueling and bridging gaps
Solar charging and battery swapping remove dependence on liquid fuel. Camping trips or short outages benefit from units like the Jackery Explorer 1000 v2 Solar Generator Kit which charges via panels and reduces refuel needs. For long outages, combine a smaller generator with layered battery storage to stretch each gallon further.
Common pitfalls & contingency playbook
Next, we’ll cover installation, safety protocols, and maintenance routines so our fuel plans translate into reliable power when a hurricane arrives.
Installation, Safety, and Maintenance: Making Backup Power Reliable
We’ve planned the fuel and chosen the right tech — now we make sure it’s installed, wired, and cared for so it actually performs when the storm hits. Below are practical steps we can act on immediately.
Choosing installers & permitting
Hire licensed pros: a master electrician for interconnection and a factory-trained installer for the genset or inverter. Ask for proof of insurance, local licenses, references, and examples of hurricane-zone installs. Get written estimates that list permits and inspections. Confirm the installation will meet the National Electrical Code (NEC) and local flood/wind codes — these aren’t optional.
Siting and storm hardening
Place equipment with these goals: above flood elevation, shielded from prevailing winds, and clear of windows and vents. Anchor generators to a reinforced concrete pad and use stainless hardware. Elevate critical battery modules on racks if your site is in a flood zone.
Safe interconnection (preventing backfeed)
Always use an approved transfer device: an automatic transfer switch (ATS) or an externally mounted manual transfer switch/interlock installed by our electrician. Never plug a generator into a household outlet — that risks lethal backfeed to crews and neighbors. Schedule the final inspection and get an approval certificate before first use.
Routine maintenance & seasonal checklist
Perform these tasks on the cadence recommended by manufacturers (examples below are common best practices):
Safety practices & PPE
Carbon monoxide risk rises after storms — exhaust must vent away from occupied spaces. Never refuel a hot generator; store fuel in approved containers, grounded during transfers. Use gloves, eye protection, and hearing protection during servicing. If we smell exhaust or CO, evacuate and call emergency services.
Documentation & readiness
Keep system manuals, wiring schematics, maintenance logs, and a fuel-use ledger in a waterproof folder and digitally backed up. Add a one-page startup checklist to our household emergency binder so anyone can safely start and stop the system when needed.
Operational Playbook: Steps to Take Before, During, and After a Hurricane
Before: timeline and immediate moves
We work backward from landfall. Key checkpoints: 72+ hours, 48 hours, 24 hours, and the last safe hour. At each stage we:
During: safe startup, load management, and monitoring
We start only if outdoors and well-ventilated; follow the manufacturer’s sequence. For efficiency and safety:
Quick decision rule:
After: cooldown, inspection, and documentation
We follow a stepwise shutdown: reduce loads, run a 10–30 minute cooldown under light load, then follow the manufacturer shutdown sequence. After shutdown:
With these actions memorized and practiced, we can move confidently into finalizing our broader resilience plan.
Taking Charge: Our Path to Resilient Power
We reaffirm that thoughtful planning, sensible technology choices, and regular maintenance let us face hurricanes with greater confidence. Use this article as a living playbook: assess our needs honestly, choose systems that match those needs, and practice operational steps until they become second nature. Start small if necessary and scale as capacity and budget allow.
Build community partnerships, share resources and knowledge, and prioritize safety in every decision. Resilience is achievable and ongoing—one practical step at a time. Let’s begin today, together, to keep the lights on. Commit to regular reviews, drills, and incremental upgrades to improve outcomes each year.