Fast Recharging Solar-Powered Stations: Why It Matters
We describe the growing need for power stations that recharge quickly from solar input. Customers expect rapid turnaround for critical applications like emergency backup, mobile deployments, and remote work sites. Fast recharge is not just a convenience; for many uses it is a requirement. We face clear technical tensions: intermittent solar supply, battery limitations, power-electronics complexity, and operational trade-offs.
Compare this with We Compare EcoFlow River 2 vs Jackery 500 for Blackouts comparison / or DELTA 2 vs RIVER 3 - Balcony-Friendly Power comparison
In this article we outline practical solutions. We explain how deliberate design and control choices let us achieve reliable, fast solar recharging. Our approach is pragmatic and reassuring. We acknowledge constraints, but show that with the right architecture, chemistry, and controls, fast recharge is both feasible and dependable. We invite you to dive into practical guidance.


Why Fast Recharging Matters for Solar-Powered Stations
Real-world drivers and use cases
We see the pressure for rapid recharge in many settings. Emergency-response teams need portable power back to 80% in hours, not days, so mobile clinics can reopen between missions. Telecom operators with remote towers want batteries topped quickly during a sunny window to avoid diesel run-time. Event power rentals and construction fleets maximize revenue by turning units around rapidly. When a station sits at low state-of-charge (SoC) for long, mission readiness drops and the risk of premature capacity loss rises.
Economic and lifecycle impacts
Fast recharge directly affects throughput and lifetime costs. Faster turnaround increases effective rental hours; for a rental fleet, shaving 4–6 hours per cycle can raise utilization by 20–30%. Conversely, keeping batteries chronically at low SoC accelerates calendar and cycle aging—something we see with lead-acid and high-NMC cells. Choosing chemistries and control strategies that tolerate rapid fills protects asset life.
Key technical trade-offs (and what to do about them)
Practical tips we use immediately
Next, we’ll dig into the fundamentals of solar input and battery chemistry so we can choose the right cells and architectures for these real-world needs.
Fundamentals of Solar Input and Battery Chemistry
Solar PV behavior that shapes charging
Solar panels are not constant-power sources — they follow V–I curves where available current depends on irradiance and cell temperature. A clear noon sun can give us near-maximum current, but passing clouds or module heating (which reduces voltage) can slice available power in seconds. That variability matters because batteries accept current differently across their State of Charge (SoC): we may have a big solar pulse early in the day that the battery can’t fully absorb without overheating or triggering taper.
A practical rule we use: size PV to deliver peak charge power during the usable SoC window (often 20–80%), and include a margin (typical planning factor 1.2–1.5) to cover acceptance losses and tapering.
Battery chemistries and fast-charge traits
Three workhorse chemistries for fast-recharge stations:
Use cell datasheets: look at internal resistance (mΩ), recommended max charge current, and temperature limits.
Charge acceptance, tapering, and SoC windows
Charge acceptance falls as SoC rises. CC–CV profiles mean we hit tapering: nearing full SoC, current must drop to follow voltage limits, wasting available PV. We therefore:
Thermal management and BMS settings — practical how-to
We’ve found these combinations of chemistry choice, SoC strategy, and thermal control let us safely compress recharge windows without surprising battery degradation.
System Architecture for Fast Recharge
We organize architecture around three truths: capture as much solar power as possible, route it with minimal bottlenecks, and let batteries accept power safely. Below we describe practical choices that do exactly that.
Array sizing and layout
We favor slightly oversized PV arrays so short, high-irradiance windows can deliver the peak charge power we need. Physically, we use string layouts that keep mismatched shading out of critical strings and favor east–west arrays for longer midday harvest when fast recharge is required. Typical system voltages for medium-to-large stations are 48–400 V DC; higher DC buses reduce conductor losses for high-power paths.
DC bus and power-conversion stages
A DC-coupled architecture usually wins for speed: PV → MPPT charge controllers → centralized or distributed DC/DC converters → battery racks. Recommended hardware examples:
Intermediate energy buffers
Small ultracap banks or short-term Li-ion buffer packs smooth PV pulses and absorb surge currents during the initial CC phase. Ultracaps (e.g., Maxwell-style modules) are ideal for second-scale smoothing; small buffer batteries handle minute-scale mismatch.
Parallel charge paths and modular racks
We split charge paths across multiple converters and modular battery racks. This lowers per-path current, eases thermal management, and makes repairs non-disruptive. In practice we aim for N+1 power electronics per critical string.
Redundancy, fault isolation, and control layers
Design for graceful degradation: string-level breakers, hot-swapable converters, and per-rack BMS gateways. A hierarchical control stack — local BMS + PV plant monitors + central EMS — coordinates MPPT setpoints, SoC-aware current limits, and fast-ride-through decisions.
Next, we dig into the power-electronics and control strategies that make these architectural choices perform reliably in the field.
Power Electronics and Control Strategies
MPPT strategies tuned to fast charge transients
Fast recharge relies on squeezing the maximum usable PV energy into the battery during short high-irradiance windows. We favor MPPT algorithms that react to rapid irradiance swings without hunting the battery. Practical approaches include:
We often run MPPT in a hybrid mode: the PV stage provides an MPPT voltage target while a downstream DC/DC or converter enforces a current limit. That lets us capture peak array power yet maintain battery-safe current ramps.
Implementing current-limited charge ramps
How we do it in the field:
Quick tip: start with conservative ramps after long idle times, then shorten once thermal behavior is validated.
Predictive control, thermal derating, and balancing
We use short-term irradiance forecasts (pyranometer + cloud-nowcast) to preemptively raise MPPT targets or precondition batteries for a high-energy window. Thermal derating is simple: attach temp sensors to racks and reduce charge current per °C above a threshold (for Li-ion, often 0.5–2% per °C depending on chemistry). During high-rate charging, active cell balancing (charge-shuttles or bidirectional converters) prevents top-cell overvoltage — essential for keeping fast cycles safe and long-lived.
Safety interlocks and microgrid coordination
Safety must be fast and visible: hardware overcurrent relays, BMS-driven contactors, overtemperature cutouts, and ground-fault interrupters are wired into the control hierarchy. For grid-tied/hybrid systems, we choose controllers that can switch between grid-following (PV injects as instructed) and grid-forming (storage holds voltage/frequency). Microgrid EMS policies prioritize fast recharge by shedding discretionary loads, calling backup gen only when needed, and coordinating multiple inverters (SMA, Schneider, Victron-style systems) to avoid fighting each other.
Next we apply these controls in real sites — sizing, siting, and operational practices that make fast recharge repeatable and reliable.
Practical Integration: Sizing, Siting, and Operations
We shift from control theory to the hands-on steps that make fast recharge repeatable in the field. Below are the practical rules-of-thumb, checklists, and real-world tweaks we use.
Sizing PV to meet a recharge window
We start with a simple energy-power balance. Decide the recharge window (e.g., restore 20–80% SoC in 3 hours), convert to required average charge power, then size PV to supply that plus losses and derating (MPPT, cabling, inverter). A typical starting formula:
Siting, layout, and hardware choices
Optimize tilt and azimuth for seasonal peaks; minimize morning/evening shading with correct row spacing and low-profile obstacles. We prefer single-axis trackers where short windows dominate — they can boost midday harvest 15–30% but add maintenance. For small remote builds, low-cost panels like the ECO-WORTHY line can let us scale quickly.

Panel selection: high-power, higher-Vmp panels reduce conductor currents; pair with MPPTs rated above max array voltage. In dusty or coastal sites we choose anti-soiling coatings and easily-cleanable racking.
Operations, SOPs, and safety
We run charging windows as scheduled jobs in the EMS: pre-warm batteries, confirm BMS health, engage soft-start ramps, monitor thermal response, then allow full-rate as validated. SOP checklist before high-rate charge:
Maintenance cadence we use: daily alarms, weekly visual/cleaning, monthly thermal scans, annual capacity tests.
Monitoring and KPIs
Our dashboards (Grafana/SCADA) show:
Case Studies, Common Pitfalls, and Future Directions
Concise case studies
Common pitfalls and concrete mitigations
Future directions — practical opportunities
These cases and mitigations show practical steps we can take now — next, we synthesize these into a concise implementation checklist.
Bringing It Together: Practical Steps for Reliable Fast Recharging
We close with actionable takeaways: match battery chemistry and cooling to fast‑charge targets, size and configure power electronics to balance maximum solar capture with safe charge profiles, and build controls that coordinate PV, storage, and load. Prioritize conservative safety margins, thermal management, and practical state‑of‑charge limits to protect lifetime while meeting throughput goals.
Operationalize monitoring and maintenance, collect field data, and iteratively tune setpoints and algorithms so real‑world performance matches expectations. We invite practitioners to treat fast recharge as a systems problem: share lessons, test carefully, and adopt disciplined operations. Together we can deliver fast, reliable solar recharging that serves demanding applications without sacrificing longevity and protect equipment health proactively today.


37 comments
Good read. Liked the Case Studies section — seeing real numbers mattered.
Minor nit: the ECO-WORTHY 200W kit is listed as an example, but it would help to have a quick comparison table (efficiency, real output in cloudy vs sunny) so people can pick panels based on location.
Thanks, Jason — fair point. We kept it high-level to avoid turning the article into a product shootout, but we can add a short appendix comparing the ECO-WORTHY kit with other panels for different insolation profiles.
Seconded — a simple chart would save newbies from over/under-sizing. I live in Seattle and my 200W behaves very differently than friends in Arizona.
Funny little rant: people act like slapping an ECO-WORTHY panel on a car turns it into a charging station overnight. 😆 The System Architecture chapter was the reality check I needed — sizing matters more than shiny specs.
Also — typo on the case study labels? Figures 3 and 4 look swapped.
Ha, agreed — marketing pictures lie 😅 Thanks for pointing out the figure swap, we’ll correct that.
Yep — always check actual watts in field conditions. I’ve seen 200W panels produce 120W under partial clouding.
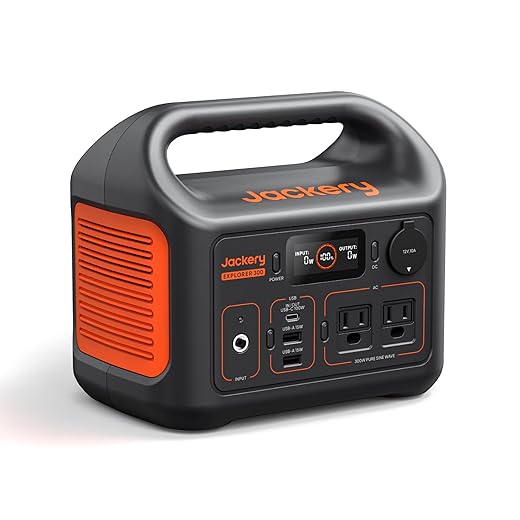
Constructive critique: the article mentions common pitfalls but doesn’t give a troubleshooting flowchart. Example: if your Jackery Explorer 300 stops accepting charge, list steps (check panel voltage, MPPT status LEDs, BMS fault codes, cable continuity). That kind of quick diagnostic would save time in the field.
On the bright side, the Future Directions section was inspiring — love the ideas around hybrid storage and predictive control.
Thanks Michael — excellent idea. We’ll add a troubleshooting flowchart and quick diagnostics checklist for popular products like Jackery and common LiFePO4 setups.
I’d use a multimeter first — checks a lot of suspects fast. Then go to the MPPT logs if you have them.
Really appreciated the Practical Integration section. Helped me decide between buying a Jackery Explorer 300 Portable 292Wh Power Station vs building a small LiFePO4 + Victron setup.
After comparing costs and flexibility, I went with a DIY 12.8V 100Ah LiFePO4 + Victron MPPT — more upfront work but way more scalable. If you want plug-and-play though, Jackery is neat. 🙂
PS: the article’s list of common pitfalls saved me from under-sizing my cabling — huge tip!
Thanks — we’ll add a short gallery with user-submitted installs in the follow-up.
Great to hear you found it useful, Mia. Your choice matches what we recommend for scalability. If you’re open to sharing, any pics of your install would help other readers.
@admin will do — I’ll upload a pic to the forum thread this weekend.
Totally—cabling is often overlooked. I had a 300W panel but thin extension cables killed my power delivery. Lesson learned the hard way.
Can you share the rough cost difference between Jackery and your DIY? Thinking about budget.
Short and sweet: Loved the ‘Bringing It Together’ checklist. If you’re running the 300W portable generator with a 60W panel, don’t expect miracles — that combo is better for camping than for fast industrial recharges.
Also, never mix cells of different ages in a LiFePO4 pack. Learned that the hard way 😬
Good point, Robert. We highlighted the 300W portable generator + 60W panel as a small-scale example for portability, not heavy-duty fast charging. And yes, mixing cell ages is a bad idea.
Agree about mixing cells — BMS won’t fix all the underlying imbalance issues.
Solid technical breakdown of battery chemistry. The Fundamentals section helped me explain LiFePO4 behavior to my non-tech roommate.
One thing I’d add: a quick note on lifecycle vs fast-charge tradeoffs — faster recharge is great, but it can reduce cycle life if not managed correctly. Loved the operational steps at the end though.
Exactly — I’d rather charge a bit slower to get more cycles if the station is stationary. For mobile/critical use, fast-charge makes sense even with slightly fewer cycles.
Good point, Priya. We did mention that tradeoff briefly, but we can expand the Practical Steps section to include recommended max C-rates for different use cases (backup vs portable vs rapid-turn deployments).
Any rule-of-thumb numbers you folks use? Like max 0.5C for longevity, 1C for fast-charges? Curious what people run in the field.
This guide was super useful — especially the part on Power Electronics and Control Strategies. I’ve been trying to fast-charge a Jackery Explorer 300 with a small panel and the tips on MPPT behavior cleared up a lot.
Quick question: anyone tried pairing a Victron SmartSolar MPPT 75V 15A Controller with a 12.8V 100Ah LiFePO4 bank for faster top-ups? Wondering about charge profile tweaks and if I should bump the panel wattage.
Also, typo on page 6 (I think) where it says 750W instead of 75V — had me confused for a sec 😅
I run a Victron into an 100Ah LiFePO4 and it’s been solid. I increased my panel wattage to 400W (two panels) and set the absorption time shorter. Battery temps stayed fine. Just don’t push the C-rate too high.
FYI, Jackery units often have internal BMS limits that affect charging. Even if your MPPT can push more, the Explorer 300 might not accept >~100W safely. Check the spec sheet first.
Thanks Emily — good catch on the typo, we’ll fix that. On your setup: Victron MPPT should work fine with a 12.8V LiFePO4 bank, but ensure the MPPT’s voltage and current limits match your panel array. If you want faster top-offs, adding a higher wattage panel (or parallel panels) helps — but monitor battery temp and use the correct LiFePO4 charge profile.
Neutral take: the article is thorough but a bit dense for absolute beginners. Maybe add a ‘quick start’ 1-page summary for people who just want to set up a Jackery Explorer 300 with a 60W panel and not build a whole system.
Still, enjoyed the case studies. Some humor would spice it up — engineers love diagrams but also need memes 😂
Yes please — a TL;DR for the lazy but curious would be perfect.
Good suggestion, Zoe. We’ll add a 1-page quick-start and maybe a lighthearted ‘cheat sheet’ with memes to keep it readable. Thanks!
Long post incoming — sorry but I got a lot of thoughts after reading the Sizing/Siting chapter:
1) If you’re deploying roadside fast-recharge stations, shade mapping is everything. We installed one with an ECO-WORTHY 200W panel and it was useless half the day because of tree shade.
2) Consider modular panel racks so you can add the 300W portable solar generator or another panel in winter.
3) For power electronics, Victron is awesome but pricey; there are cheaper MPPTs that work if you accept fewer features.
4) Don’t forget cooling for battery racks — LiFePO4 loves stable temps.
Overall great article, practical and not too theoretical. Would love a downloadable checklist for field teams.
Appreciate the detailed feedback, Tom. We’re working on a checklist PDF that covers siting, sizing, and ops — will include shade-mapping tips and modular rack suggestions. Good note on cooling too.
You mentioned cheaper MPPTs — any recs? I’m retrofitting an old van and funds are tight.
Totally agree on shade mapping — I use a phone app to model sun paths before buying panels. Saved me from a bad install.
@Hannah I used a budget 20A MPPT from a lesser-known brand for my van and it’s been fine for basic charging. But if you want Bluetooth, logging, and advanced settings, Victron’s features are worth it imo.
Couple practical Qs: if I have a Victron SmartSolar MPPT 75V 15A Controller and an ECO-WORTHY 200W kit, is it better to wire panels series or parallel for a 12.8V 100Ah bank? I’m confused about voltage vs current optimization — the article helped but I could use a simple rule-of-thumb.
Rule-of-thumb: match the MPPT’s input range and optimize for the MPPT’s MPP voltage. For a 12.8V bank, series panels raise voltage which helps with MPPT efficiency and reduces wire losses, but ensure VOC stays below 75V (especially cold temps). Parallel increases current but needs thicker cables. If you only have two panels, series is often simplest.
Also think about shading — series strings suffer more from single-panel shading unless you have bypass diodes or microinverters.