

Why choosing the right high‑watt‑hour power station matters for your fridge and freezer
Compare this with Jackery comparison / or Fridge, Unplugged: Run It Long-Term on One Power Station
We explain why powering refrigeration during outages or off‑grid life is different from running lights or phones. Fridges and freezers draw steady power, need extra surge at start‑up, and must run long enough to keep food safe. We reassure you that with clear steps we can avoid spoilage and unnecessary waste.
This guide walks through sizing capacity, matching inverter output to surge needs, battery chemistry choices, recharge options, and practical installation tips. We aim for plain‑spoken, technical guidance so you can pick a high‑watt‑hour station that fits your routine, protects your groceries, and gives peace of mind when power is uncertain and clear steps to follow today.
Understanding fridge and freezer power needs: steady draw, start‑up surge, and runtime
Two ways refrigerators use power
Refrigeration appliances use electricity in two distinct ways: a steady running draw while the compressor maintains temperature, and a much larger start‑up (inrush) surge when the compressor kicks on. We think of the steady draw as the “everyday” cost and the surge as the thing that trips undersized inverters.
Reading nameplates and interpreting numbers
Look for volts (V), amps (A), and any listed starting watts or LRA (locked‑rotor amps). If only amps are given, multiply: watts = volts × amps. A nameplate that says 120 V and 5 A equals 600 W running. A starting current of 30 A at 120 V implies a surge near 3,600 W — which must be handled briefly by your inverter.
Turning watts into watt‑hours and runtime
Watt‑hours = average watts × hours. For runtime from a battery, use usable Wh (battery capacity × DoD) and subtract inverter losses (typically 10–15%). Quick example: a 1,000 Wh usable battery supplying a 200 W fridge will last roughly 1,000 ÷ 200 × 0.9 ≈ 4.5 hours.
Duty cycles and real‑world factors
A fridge cycles: compressor on for a period, off for a period (duty cycle). Defrost heaters, ambient temperature, how often you open the door, and setpoint all change both average draw and surge frequency. Hot garage installation can double run time compared with a cool kitchen.
How to measure actual consumption
We recommend a plug‑in energy meter (Kill‑A‑Watt), or a circuit monitor (Emporia, Sense). Measure for at least 24 hours to capture cycles and peaks. Key steps:
Typical ranges to expect
Next, we’ll use these measured and estimated numbers to size a high‑watt‑hour power station that meets your runtime and surge needs.
Sizing a high‑watt‑hour power station: matching capacity to realistic run time goals
We walk through practical sizing so your fridge/freezer lasts as long as you need — from a single overnight outage to several off‑grid days — without nasty surprises.
The simple math (and a quick example)
Use this core formula to size the battery bank you actually need:
Required battery Wh (nominal) = (average appliance W × desired hours) ÷ (DoD × inverter efficiency)
If a fridge averages 200 W and you want 12 hours:200 × 12 = 2,400 Wh usable.
Assume 80% DoD and 90% inverter efficiency: 2,400 ÷ (0.8 × 0.9) ≈ 3,333 Wh.
We’d round up to ~4,000 Wh to give breathing room for temperature and extra cycles.
Factor adjustments to apply
Safety margins and surge headroom
Always oversize:
Decision paths (quick picks)
Quick sizing table (24‑hour target)
| Fridge type | Minimum Wh | Comfortable Wh | Generous Wh |
|---|---|---|---|
| Compact/dorm | 400 | 800 | 1,200 |
| Mid‑size | 1,000 | 1,800 | 3,000 |
| Full‑size | 1,500 | 3,000 | 5,000 |
Inverter type, continuous vs surge power, and waveform considerations
What the inverter actually does
The inverter is the bridge between our battery bank and the compressor motor. It converts DC into the AC that the compressor expects, and it needs to supply both the steady running watts and the short, high surge that occurs at start‑up.
Continuous vs surge — how to read the numbers
Continuous rating = the watts an inverter can deliver indefinitely; surge (peak) = the short burst it can provide to start motors. Both matter because a fridge might run at 150–300 W but require 1,500–3,000 W to spin up.
Key points to check:
Inverter thermal protection and overload behavior also matters: some units fold back output or shut off after repeated starts, so choose an inverter that sustains surge without overheating.
Pure sine vs modified sine
Compressors prefer pure sine: it runs cooler, starts more reliably, and avoids electrical noise that can confuse control boards. Modified sine can work on tiny units, but we’ve seen increased heat, buzzing, and failed starts — especially on modern fridges with electronic controls.
Multi‑output, parallel inverters and practical tips
Next we’ll look at how battery chemistry and real‑world depth‑of‑discharge affect how much usable energy those inverters actually have to work with.
Battery chemistry, lifecycle, and real‑world performance for refrigeration
Chemistry at a glance
We compare three common chemistries with fridge/freezer needs in mind:
Practical example: many large stations now offer LiFePO4 options (check spec sheets on models like EcoFlow/Bluetti/Jackery lines) — the LFP variants cost more up front but promise far more cycles.
Usable watt‑hours vs rated capacity
Rated Wh is a starting point; usable Wh = rated Wh × usable DOD × inverter/convertor efficiency (~0.85–0.95) × health factor (declines with age). So a 2,000 Wh battery at 90% usable DOD and 90% inverter efficiency gives ~1,620 usable Wh fresh out of the box. Always calculate usable Wh when estimating runtime, not just advertised capacity.
Cycle life and real‑world cost
Cycle life changes the cost per use: a higher‑cycle LFP pack spreads its higher upfront cost over many more runs. Quick rule: cost per usable‑Wh‑cycle ≈ cost / (usable Wh × cycles). In practice, LFP often wins long‑term for daily or frequent use (backup fridges) while NMC or lead‑acid can make sense for occasional use or weight‑sensitive setups.
Cold performance and safety
All batteries lose effective capacity in cold: expect 10–40% capacity drop near 0 °C, worse at negative temps. LiFePO4 is safer but generally should not be charged below ~0 °C unless the unit has cell‑heaters; NMC also dislikes cold charging; lead‑acid accepts cold charging better but still loses available capacity.
Practical battery management tips
Next we’ll look at charging, recharge time, and integrating solar or generators to keep that usable energy topped up.
Charging, recharge time, and integrating solar or generators
We outline practical charging options and how recharge speed shapes multi‑day planning for refrigeration.
AC wall charging and realistic times
Most large stations accept AC input (500–3,000 W). Expect net charge time = usable Wh ÷ input W ÷ efficiency (≈0.9). Example: a 2,000 Wh station with 1,600 Wh usable charged at 500 W takes ~3.5 hours; at 1,200 W it’s ~1.5 hours. Many makers (EcoFlow, Bluetti, Jackery) publish max AC input — check that number, not advertised Wh alone.
Solar: sizing, MPPT, and peak sun
Solar is sustainable but needs proper sizing:
Example: a 5 kWh/day fridge load needs ~1.25 kW of panels at 4 peak sun hours (before losses).
Generator topping and coupling choices
For backup generators, inverter models (Honda EU2200i, Yamaha EF2000iSv2) give clean sine waves and low THD. Decide coupling:
Pass‑through, simultaneous use, and practical rotation workflows
Many stations allow pass‑through but simultaneous high charging and heavy AC draw reduces net charge or may disable fast charging. In outages we recommend:
Next we’ll cover practical installation, safety practices, and everyday tips to make these plans reliable.
Practical installation, safety, and everyday tips to get the most from your power station
Placement and thermal management
We place the station in a cool, ventilated spot—out of direct sun, off concrete (a shelf or pallet), and with 6–12 in (15–30 cm) clearance around vents. Stations like the EcoFlow Delta Pro or Bluetti AC300 will throttle or shut down if air flow is blocked; same goes for condenser clearance behind fridges. In hot weather we moved a chest freezer to a shaded garage and cut temperature-related cutouts in half.
Cabling, connectors, and grounding
Use the right cable for the job: for household 120 V fridge circuits, 14 AWG is OK for 15 A, 12 AWG for 20 A; use heavy‑duty 12/3 or 10/3 extension cords for longer runs. For DC or accessory ports, stick to manufacturer connectors (Anderson Powerpole, XT60, or MC4 for solar). If tying into home wiring, install a proper manual or automatic transfer switch (e.g., Reliance) and have a licensed electrician verify grounding and GFCI protection—don’t jury‑rig neutrals or grounds.
Smart switching and monitoring
We prefer a transfer switch or a smart outlet (TP-Link Kasa, or a dedicated appliance relay) to make switching seamless. Monitor temps and battery state with apps and sensors: Temp Stick and SensorPush give fridge/freezer alerts; EcoFlow/Bluetti/Jackery apps show SOC and runtime. Keep a simple log (paper or app) of temps and charge cycles during an outage.
Everyday strategies and maintenance
Stack chilled items in coolers with ice packs to reduce door openings. Test your setup monthly: run a simulated switchover, clean dust from fans, update firmware, and inspect cables and seals. Pack an emergency kit: spare heavy‑duty cords, replacement fuses, a digital thermometer, ice packs, and a small LED lamp.
Quick troubleshooting
Nuisance shutdowns? Check for overheating, overloads, or low input voltage. Unexpected drains often come from lights, defrost cycles, or ice makers—use a smart plug or clamp meter to find culprits. Recharge bottlenecks are usually input limits; either increase generator/panel input or stagger charging cycles.
With the installation steady and monitoring in place, we’re ready to bring these elements together and plan for food safety in the Conclusion.
Bringing it together: choosing with confidence and planning for food safety
We’ve covered how to assess steady draw and surge, match watt‑hours to realistic runtimes, select inverters and battery chemistries, and plan charging with solar or generators. Prioritize accurate measurement of appliance draw and pick a system with both enough continuous wattage and comfortable surge headroom so compressors start reliably and run longer than our minimum needs.
When choosing, err toward a modestly larger system for peace of mind: extra watt‑hours and surge headroom cut spoilage risk. Also adopt simple practices — temperature checks, organized loading and periodic testing — so runtime is realistic and performance reliable. With thoughtful sizing and these basic habits we keep food safe through most outages confidently.


24 comments
Question about solar integration: if I buy the Anker SOLIX C1000 Gen 2 1,024Wh Power Station and want to top it via panels, how many panels should I realistically get to recharge in a day if I lose power for 12 hours? I’m in a pretty sunny area but not all day.
Good question. As a rough example: to fully recharge a 1,024Wh station in about 6–8 hours of good sun, you’d want around 200–300W of panels (or multiple panels totaling that). For quicker recharge or cloudy days, scale up. We’ll add sample calculations in the solar section to make this clearer.
Also factor in charge controller limits — some stations accept limited PV input. Check Anker’s max PV input spec before buying panels.
Thanks! That helps. I didn’t think about the PV input cap — will check the specs before buying panels.
Short and blunt: if you expect the power to go out often, buy something that’ll actually run your freezer without crying for mercy. 😂
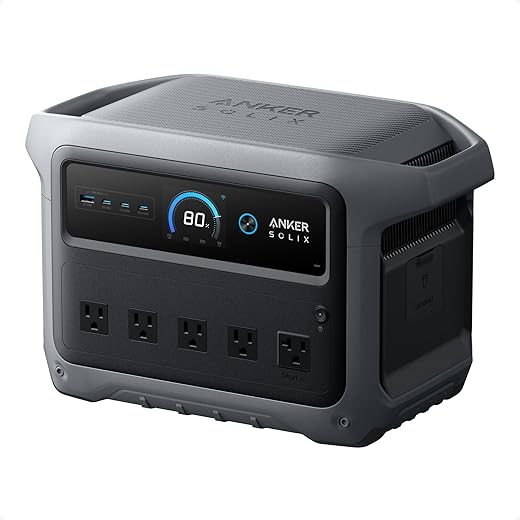
Anker SOLIX C1000 seems like the sweet spot for most folks who want a balance between size and power. Jackery 300 is cute but tiny. BELTTT inverter if you like tinkering and loud fans.
Agreed with Samuel. If you want peace of mind, pick a larger-capacity unit and sleep better.
Ha — fair 😂. The Anker does hit that mid-range sweet spot for many. We left the Jackery in the article as a great portable option for smaller fridges or short-term use.
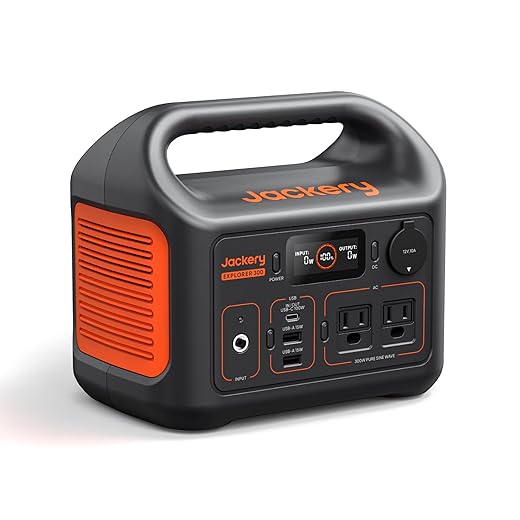
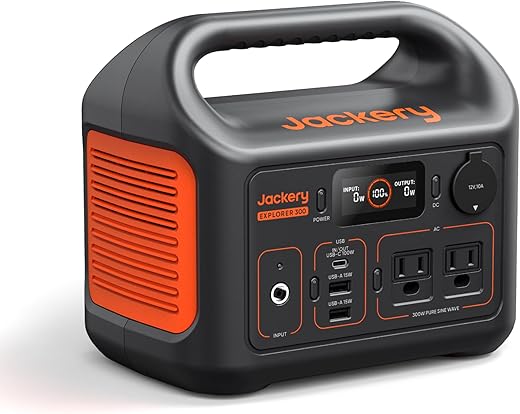
Great breakdown — thanks! Quick question: my chest freezer has a pretty hefty start-up surge. The article mentions surge vs continuous power, but I’m still unsure if the Jackery Explorer 300 LiFePO4 is a safe bet for that initial kick. I like the portability of the Jackery, but worried about startup amps. Anyone tried using it with a bigger freezer?
If you can, check the freezer’s startup watt spec (or measure with a clamp meter). That’ll tell you if the Explorer 300’s surge covers it. Otherwise, go for SOLIX C1000 or the BELTTT inverter with a proper battery.
I had a similar worry. Ended up using the Jackery for my mini-fridge only, and it worked flawlessly. For my chest freezer I borrowed a 1,000+Wh station and it handled the start-up fine. TL;DR: Jackery 300 = excellent for small fridges, borderline for big freezers.
Good point, Liam. The Explorer 300 is great for steady draw but its surge rating is limited compared to larger units. For a big chest freezer you’d typically want a higher continuous and surge capacity — the Anker SOLIX C1000 will handle larger surges better, and a dedicated inverter like the BELTTT 2000W gives more headroom if you’re pairing with a battery bank.
Quick practical tip from a DIY install: when you mount a BELTTT 2000W inverter in a garage, leave at least 2–3 inches around it for airflow. I once buried mine in a cabinet and it kept tripping on overheating. Also, cable gauge matters — don’t cheap out on the positive/negative runs to the battery.
Great practical advice, Daniel. We’ll add a clearer section on ventilation and cable gauge in the installation tips. Those are common causes of poor performance and safety issues.
Agree — big gauge cables and good fusing are lifesavers. And label everything so guests don’t unplug your fridge mid-power outage!
Love the section on realistic runtime goals — that stuff is always glossed over.
I have a couple of notes/questions:
1) The real-world runtime numbers are so dependent on compressor cycles and ambient temp, you really need to plan for worst-case.
2) Does anyone have experience chaining the BELTTT 2000W inverter to a LiFePO4 pack and then using a power station as a UPS? Seems overcomplicated but curious.
3) Also, typos: ‘surge’ is spelled correctly, but I almost missed the part about waveform — please emphasize pure sine for modern fridges.
Thanks for the thorough piece!
I agree about worst-case planning. I sized mine assuming a heatwave and opened the freezer a few times a day (kids…). Saved my food during a 36-hour outage.
One more note on the BELTTT: it’s a solid inverter but it’s only as good as the battery it’s connected to. Make sure the battery chemistry and BMS can handle the repeated surges.
Minor tip: put a Wi-Fi temp logger in your freezer so you can actually track cycle behavior. Saved me from under-sizing my system.
Thanks for the detailed feedback, Maya. You’re right on all counts: ambient temp and cycle frequency make the biggest difference. Chaining an inverter to a battery is doable but can add inefficiency and failure points — if you need UPS behavior, a single integrated power station with good inverter specs is usually cleaner. We’ll add clearer emphasis on pure sine in the next edit.
Saved my Thanksgiving turkey once when the grid died — used a buddy’s SOLIX C1000 and it kept the freezer at safe temps for ~30 hours. No drama, food saved. Article nailed the food safety planning bit.
Quick tip: rotate a backup cooler with ice if you expect long outages.
It was a team effort — also used thermometers in the freezer and some dry ice as backup. Don’t underestimate simple tools.
Great reminder about thermometers and simple backups. We’ll add that to the ‘everyday tips’ checklist.
Fantastic anecdote, Carlos — exactly the kind of real-life example we wanted to highlight. Thanks for sharing!
Love a good Thanksgiving rescue story. 😄 The SOLIX really seems like the workhorse option for these situations.