Why We Unplug Our Fridge (and Why It Can Work)
We unplug our fridge intentionally because running it from a portable power station can be practical and comforting. Whether we’re prepping for outages, living off-grid, or on the road in an RV, a single well-chosen power station can keep food safe and reduce stress.
Compare this with Jackery comparison / or How We Pick High‑Watt‑Hour Power Stations for Fridge & Freezer
Refrigerators have predictable power patterns: brief high startup draws and much lower steady running currents. Long-term operation comes down to matching those peaks and averages to battery capacity and inverter capability.
Our tone is practical and reassuring. We focus on real-world trade-offs, clear calculations, and simple tricks so we can decide what works for our household. We’ll show what’s realistic and what to avoid in practice.


Understanding Fridge Power Use: What We Need to Know
We’ll break down how refrigerators really draw power so we can size a power station sensibly. Once we understand the peaks, averages, and what makes them change, planning becomes straightforward — not scary.
Startup (surge) vs. steady (running) watts
Compressors need a short, strong surge to start. This can be 2–7× the steady running watts depending on motor type and age. We’ve seen small compact fridges start easily on a 1,000 W inverter, while an older full‑size unit can trip the same inverter during motor spin‑up.
Tips:
Duty cycle, ambient temperature, and defrost
A fridge doesn’t run continuously. Duty cycle = the percent of time the compressor runs. That depends on:
Practical note: in a cool basement our mid‑size fridge might run 30–40% of the time; in a hot porch it can hit 60–80%.
Compact vs mid‑size vs full‑size — what to expect
New ENERGY STAR models often run less and cycle smarter than 10–15 year old units.
Example models for reference: Danby 3.3 cu ft (compact) typical low draw; Samsung/Whirlpool full‑size models vary widely—always check spec sheets.
Watts vs watt‑hours — estimating daily kWh
Convert running watts to daily energy: running W × duty cycle × 24 / 1000 = kWh/day.
Short bursts, inverter choice, and battery stress
Short high peaks demand an inverter with enough surge headroom and a battery that tolerates current draws without severe voltage sag. Repeated large surges shorten battery life and may trip protective electronics. Look for inverters with documented surge capability and batteries (LiFePO4 preferred) rated for high discharge if your compressor is hungry.
Next, we’ll use these numbers to pick the right power station — capacity, chemistry, and inverter specs that match both the surge and the long‑term energy needs.
Choosing the Right Power Station: Capacity, Chemistry, and Inverter
Read battery capacity the useful way
Battery ratings are in watt‑hours (Wh). That’s energy we can use: a 1,000 Wh pack theoretically gives 1,000 W for one hour. In practice, usable energy = Wh × usable depth of discharge (DoD).
Always use usable Wh for run‑time math, not the raw number on the spec sheet.
Chemistry: why it matters for usable capacity, life, weight, safety
We think chemistry is one of the biggest practical choices.
Pick chemistry based on how often we’ll use it and how portable it needs to be.
Inverter specs: continuous vs surge, and waveform
Compressors demand two things: steady watts and a strong short surge.
Also check inverter efficiency (losses) — that affects how much of the battery’s Wh actually reaches the fridge.
Charging options and recharge timing
We want flexible charging: AC wall, solar (MPPT), and vehicle. MPPT solar charge controllers matter — they deliver more power from panels, especially in real‑world conditions.
Faster charge rates shorten the “cold‑kick” recovery window and let us run smaller packs confidently.
Practical trade‑offs and feature priorities
We balance portability vs capacity: lighter NMC packs for short trips, LFP for long‑term home backup. Prioritize in this order: usable Wh (DoD), pure sine inverter with sufficient surge, MPPT charging, and cycle life. A model family to check for those features includes EcoFlow, Bluetti, and Jackery — but always verify chemistry, surge rating, and MPPT specs before buying.
Next, we’ll turn those component choices into concrete numbers and scenarios so we can size a station that meets our real‑world needs.
Sizing for Long-Term: Calculations and Scenarios We Trust
We’re practical about numbers — here’s the step‑by‑step we follow when we size a power station so our fridge can run for days or weeks without drama.
Step 1 — Measure or estimate the real draw
We prefer measuring with a Kill‑A‑Watt or a clamp meter over relying on nameplate numbers. Note two values:
If you can’t measure, use appliance labels as a starting point and increase duty cycle for hot weather and frequent openings.
Step 2 — Turn that into daily energy (Watt‑hours)
Calculate fridge energy per day:
Adjust for conversion losses and margin:
Convert to battery pack sizing:
Convert to amp‑hours at a given voltage:
Quick examples we actually used
Mini fridge (3–4 cu ft)
Mid‑size household fridge
Chest freezer (occasional use)
Adding solar and planning for cloudy stretches
To sustain operation with solar:
Example: 1,600 Wh/day ÷ 0.75 = 2,133 Wh. With 5 peak sun hrs → ~430 W of panels (we’d pick two 250 W panels).
For multi‑day cloudy resilience, multiply daily usable Wh by desired days of autonomy and size battery accordingly. That’s the core math we trust and use when choosing a station and a recharge plan.
Stretching Runtime: Practical Ways We Make It Last
We want every watt to work smarter, not harder. Here are the everyday and technical tweaks we use to stretch runtime without risking our food.
Thermostat, power‑save, and defrost habits
We nudge the fridge thermostat a notch warmer (0.5–1°C) while watching internal temps, and enable any “eco” or power‑save modes. Regular defrosting is huge: a thick frost layer can increase run time by 20–30%. Small changes here cut compressor hours without changing what’s in the fridge.
Prep, organization, and thermal mass
Pre‑cooling groceries before they enter the fridge lowers recovery time. We batch‑chill new items on a cold shelf or in the freezer first. Inside, we organize by frequency of use: high‑use items up front, long‑term items in back, so doors stay shut longer.
Passive insulation and ice packs
Adding thermal mass is one of our favorite tricks. Frozen gallon jugs, commercial ice packs, or a block of ice in a cooler space reduces temperature swings and compressor duty. For short outages we drape insulated blankets over the fridge (not blocking vents) to slow heat gain.
Behavioral shifts that matter
Small habits add up:
Technical tweaks & power management
We disable nonessential lights, interior fans, or circulation features that add draw. On the power station side, we dedicate a single AC output to the fridge and label it “priority.” If available, we use a smart transfer switch or load manager to stagger heavy appliances so the fridge doesn’t compete with a microwave or HVAC. For stubborn start surges, a small UPS‑style battery or soft‑start device can give the compressor the kick it needs without upsizing the whole station — think a compact 12 V battery pack (20–50 Ah) or a portable power station with a high surge rating (EcoFlow/River or similar).
Food safety and monitoring
We keep the fridge at ≤40°F (4°C) and the freezer at 0°F (−18°C). If power is lost, an unopened fridge usually keeps foods safe about 4 hours; a full freezer about 48 hours (24 hours if half‑full). We monitor with dial thermometers and remote sensors (SensorPush, Temp Stick) so we can act before temperatures climb.
Next, we’ll show how these tactics look in real setups and the simple maintenance habits that keep the whole system reliable.
Real-World Setups, Safety, and Maintenance for Peace of Mind
We’ll lay out three concrete setups and the safety/maintenance habits we follow so we can install and run our fridge confidently.
RV setup — compact and mobile
In the RV we favor a high‑surge portable power station (EcoFlow Delta / Goal Zero Yeti class) connected to the fridge’s dedicated AC outlet, or for 12 V fridges we hardwire to the RV DC bus with an inline fuse. Key wiring points:
We keep the station accessible so we can monitor temps and swap loads quickly.
Small off‑grid cabin — stationary bank for days of autonomy
For a cabin we build a small LiFePO4 bank (100–400 Ah), a 1500–3000 W pure‑sine inverter, and a manual transfer/isolation device so the cabin loads are only fed by the inverter when needed. We place batteries in a ventilated, frost‑proof box on a concrete or metal shelf, with a DC breaker between battery and inverter and a battery monitor (Victron/SmartShunt) for SOC visibility.
We label all AC circuits and dedicate a single breaker for the fridge circuit to simplify switching during outages.
Home emergency backup — safe grid isolation
At home we use either a generator‑rated manual transfer switch or an interlock kit (installed by a pro) to eliminate backfeed to the grid. Our rule: if we’re hardwiring the inverter to the house panel, we get a licensed electrician to install and size the breaker (NEC recommends sizing breakers to handle 125% of continuous inverter output). We also keep a portable power station for quick, plug‑and‑play fridge power.
Electrical basics we always follow
Battery care and routine checks
Quick safety reminders
With these real setups and habits in place, we minimize surprises and keep both our family and our food safe as we move on to laying out our final plan.
Our Plan to Keep the Fridge Running—Confidently and Safely
We’ll start by measuring our fridge’s actual draw, then choose a power station with generous headroom and the right chemistry and inverter. For multi‑day needs we’ll add recharging—portable solar or a generator—and plan recharges during low‑usage windows.
We’ll stretch runtime with simple conservation: set efficient temps, minimize door openings, pre‑chill items, and use ice packs. Follow safe installation, ventilation, and battery maintenance routines, plus periodic testing. With this roadmap we’ll keep food cold, reduce waste, and stay calm whether camping, off‑grid, or riding out an outage.


44 comments
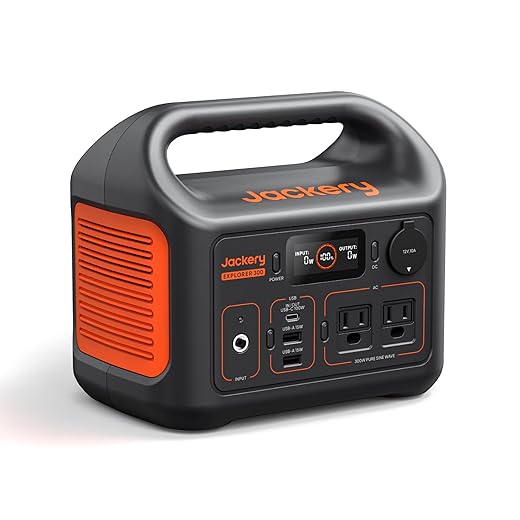
Real talk: People keep mentioning the Jackery Explorer 300 — it’s cute but not a long-term fridge solution unless your fridge is tiny or you’re fine with frequent manual swaps.
If you’re planning for extended outages, get a bigger power station or add a LiFePO4 battery bank. Don’t be seduced by flashy marketing pics of fridges running for ‘days’ — read the fine print. 😉
We hear you, Linda. The Explorer 300 is useful for small fridges or short-term needs; the article frames it as an example, not a one-size-fits-all solution. For extended use, a larger battery or LiFePO4 array is recommended.
Yup — my cousin thought a tabletop power station would run his whole fridge for a week. Nope. He learned fast. 😂
Also watch warranties — running some appliances off unsupported inverters may complicate service claims.
Good strategy — redundancy and layered solutions often offer the best balance of cost and reliability.
I like combo approaches: smaller portable units for short outages and a backup generator or bigger battery for long ones.
I recently combined a small PV array, a ZeroKor-style generator, and a manual transfer switch for partial house backup.
It works well: solar covers daytime fridge load and the generator/battery bridge nights. One tip: automated transfer is nice but manual is simpler and less expensive for occasional use.
Happy to share wiring pics if anyone wants real-world examples.
Thanks Michael — sharing wiring pics would be super helpful for readers. Your layered approach (solar day, battery/generator night) is exactly the resilient setup we recommend for longer outages.
Pics please! Always nice to see how others solved layout/space issues.
ZeroKor 300W with panel caught my eye. Anyone used that as a day/night solution for a small fridge? Thinking: solar during sun, reservoir battery at night. Seems doable but worried about cloudy days.
Also — what chemistry did you recommend? Lithium iron phosphate or regular Li-ion? I know LiFePO4 lasts longer but is pricier.
One more tip: if you go solar+storage, oversize the PV by ~30% for real-world losses (angle, wiring, inverter inefficiency).
ZeroKor-type combos can work if your panel gets enough sun and the generator’s battery has enough capacity. For long-term resilience, LiFePO4 is the better choice due to cycle life and thermal stability; but for occasional outages Li-ion can be fine. The key is sizing: make sure daily solar input + battery capacity cover the fridge’s daily consumption with a margin for cloudy days.
Cloudy days are the killer. Add more panel wattage or a bigger battery if you’re in a gray climate. Also, set expectations: 300W panel isn’t magic but helps a lot during summer afternoons.
LiFePO4 all the way if you plan to cycle it a lot. I swapped in a LiFePO4 bank last year and the longer cycle life is already paying off.
Shoutout to the 2-Pack Refrigerator Thermometer Large Dial with Hook — tiny thing but SUPER handy.
I hang one on the top shelf and one near the door so I can see temp gradients. Saved my leftover cake once when temps crept up during a storm. 😅
Question: where did you recommend placing thermometers in the article? I like them visible without opening the door.
Oooh tape to the glass — that’s smart!
Also remember to calibrate if you suspect inaccuracy — put them next to a known temp for a minute (like an ice bath) and note any offset.
Great tip, Zoe — we recommend one near the coldest point (usually back or lower area) and one near the door/high shelf where temps fluctuate more. Hanging them with the included hook keeps them visible without opening the fridge too much.
I tape mine to the glass shelf edge so it’s easy to read. The dial ones are great because no batteries!
Safety note: if you plan a semi-permanent install, remember condensation and drip pans. I had a setup in my garage and the moisture killed a cheap inverter’s connectors over one winter. Seal things, elevate electronics, and keep vents clear.
Also, think about CO safety if you’re using a gas generator as backup — that 100A transfer switch makes integrating safer but doesn’t replace CO precautions.
Agree on labeling — and if you go the manual transfer switch route, keep a cheat-sheet near it for which breakers to flip and any sequencing steps.
Also label circuits! If you ever swap things around in the breaker box, clear labeling avoids accidental overloading.
Excellent points, Hannah. Moisture and ventilation are often overlooked. We advise mounting the power station off the floor, using IP-rated enclosures for any permanent wiring, and installing CO detectors if any combustion generator is in the plan. The transfer switch helps transfer loads safely but doesn’t mitigate generator hazards.
I live in a humid area — I added silica packs and raised the inverter on a metal shelf. Saved me from a flooded electronics nightmare.
Nice article, but please be more explicit about start-up current assumptions in the ‘Sizing for Long-Term’ section.
My constructive nitpick:
– You show average watts but compressors have big spikes (maybe 600–1200W for a normal fridge).
– Inverter continuous vs surge matters a lot.
– Also mention ambient temp: 90°F garage vs 60°F kitchen makes a huge diff.
Would love an extra table showing run times for 292Wh, 500Wh, 1000Wh batteries with 100W, 200W, 400W avg loads.
Also don’t forget door openings — family members open the fridge 800 times a day. 😂
If anyone’s curious, my workaround was to use a chest freezer for long outages — much more thermally stable and lower duty cycle.
Great feedback, Mark — totally agree. We used a conservative 4x running watts for startup in the examples but we should’ve called that out more clearly. We’ll add a chart showing run times across common battery sizes and average loads, and include ambient temp scenarios. Thanks!
I second the chart idea. Visual helps when you’re deciding whether to buy a second battery.
Good point on door openings — our models include a factor for ‘typical use’ but we can add a worst-case scenario with lots of openings.
Great write-up — I loved the step-by-step calculations. A couple thoughts:
1) The Jackery Explorer 300 (292Wh) sounds sweet for weekend camping, but I’m skeptical about running a full-size fridge for days.
2) Did you assume a compressor duty cycle or use measured watt-hours? That makes a huge diff.
3) Also curious about the 100A manual transfer switch mention — is that just for whole-house setups?
Been thinking of trying this for a small apartment fridge, but want to be sure I won’t wake up to warm milk. 😬
Thanks Sarah — we used both measured watt-hours from a plug meter and realistic duty-cycle assumptions in the article. For most upright fridges we modeled a 30–40% duty cycle (averaged over 24h) depending on ambient temp. You’re right that 292Wh will only last a few hours for many fridges, so the Jackery example is more for micro-fridges or short outages. The 100A manual transfer switch is for integrating a generator/power station into a panel — not required for a single-port inverter setup, but handy for larger installs.
I ran a Jackery like that for my dorm mini-fridge and it worked fine overnight. For anything bigger, buy bigger battery lol.
If you have a plug meter, measure watt-hours overnight — that’s the simplest way to know. Also try putting a thermometer in the warmest shelf; you might be surprised how slow temps change if the door stays shut.
This is super practical. Love the ‘Stretching Runtime’ tips — especially the ice packs and pre-chill trick.
A few small tips from me:
– Fill the water bottles and tuck them around perishables.
– Keep a pack of thermometers (2-pack dial ones are cheap) so you can monitor different shelves.
– Label the temp you want to hit before the outage.
Thanks Emily — exactly the kind of practical tips we were aiming for. The 2-pack thermometer you mentioned (the dial ones) are in the product list because they’re cheap and reliable for quick checks.
Agree on bottles — they act as thermal mass. Also, move items that must stay frozen to a lower compartment first.
Question about long-term sizing: if I want to keep a full fridge (not freezer) for 5 days, what’s the rough battery capacity I should target? I’m leaning toward LiFePO4 for longevity, any ballpark numbers would help.
Ballpark: measure your fridge’s daily kWh (many upright fridges are 0.8–1.5 kWh/day depending on size and ambient temp). For 5 days, multiply by 5 and add a 30–50% buffer. So if it’s 1 kWh/day: 5 kWh needed → plan for ~6.5–7.5 kWh usable. LiFePO4 at 80% DoD means ~8–9 kWh nominal. If you’re not sure, aim higher — it’s nicer to have headroom.
That’s a lot of batteries… and money. But peace of mind is worth it for some folks.
Yep — and if you add a small generator or more PV you can shave that requirement. Also check inverter efficiency (usually ~90–95%) when calculating.
I’ve installed a 100A manual transfer switch before, and a few thoughts:
– Make sure your electrician verifies the panel bus and breaker spacing.
– The transfer switch listed is general-duty; for a dedicated refrigerator circuit it’s probably overkill unless you want whole-house capabilities.
– If you’re not comfortable with mains wiring, pay the pro — it’s not worth a DIY mistake.
Thanks David — great practical warning. For many readers, a portable power station plugged into the fridge is enough without any panel modifications. The 100A transfer switch is for people wanting a semi-permanent generator/power-station integration.
Quick q: does the transfer switch require a specific panel brand? Or is it pretty universal?